After doing all my thong pattern modifications and getting the fabric and lace pieces cut and ready, I’m so excited to actually sew it together! I have a feeling this part will go faster. You know that saying, “Measure twice, cut once”? I think that applies perfectly to sewing projects— taking the time to prepare the patterns and fabric pieces maybe won’t guarantee a perfect result, but it does give you a heck of a head start.
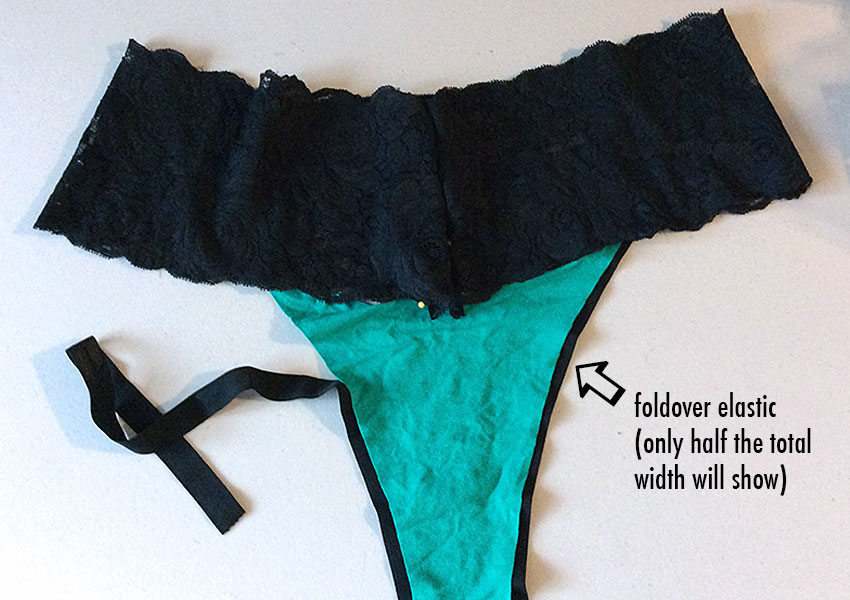
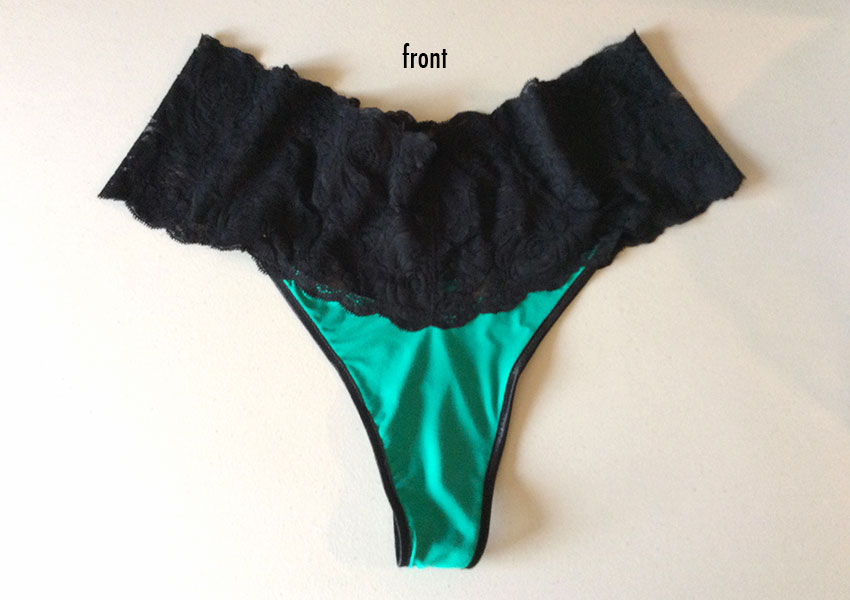
Here’s where I left my thong:
You’ve probably noticed this already, but whenever I’m making something for the first time, I like to plan the steps before I start sewing; it helps me to figure out the logical sequence of construction. So here’s my plan for sewing this thong:
1. Stitch lace seams (center front, center back); press open, topstitch, trim excess.
2. Prepare crotch lining piece; sew front/back/lining seam; stay-stitch lining to front.
3. Add foldover elastic to thong edges.
4. Sew lace to top of center front and center back.
5. Admire my handiwork! (Natch.)
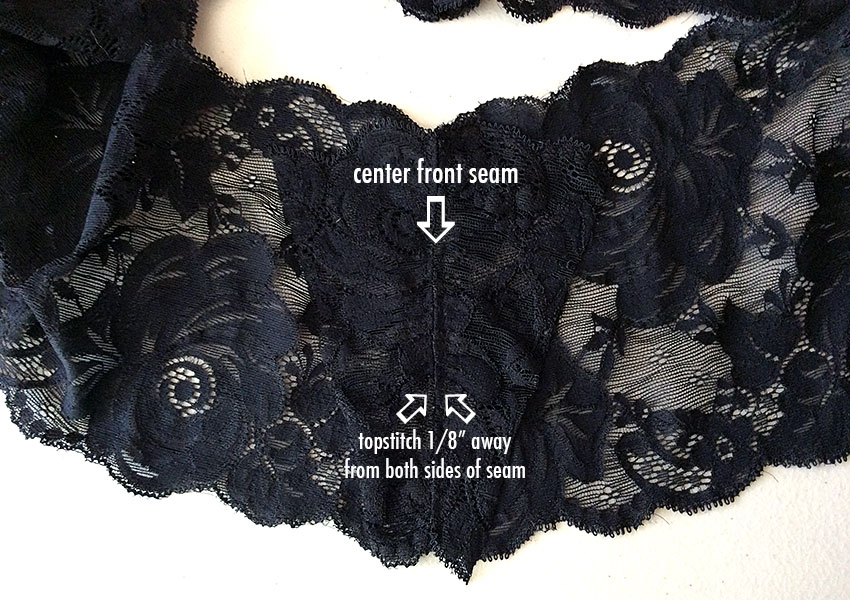
Not so bad, eh? I’ll get started by sewing the mitered (angled) seams in my lace pieces. After pressing the seam open, I’ll topstitch on both sides of the seam.
Tip: Use a narrow, shallow zig-zag stitch for both the seams and the topstitching. Machine settings vary, but what I’m using is 3.0 width, 1.5 length.
Aside: I realized too late that using black lace makes it pretty difficult to see details in my photos— I’m sorry! In an attempt to make it up to you, I’m including as many notes, arrows, and other bits of information as possible right on the photos. End of aside.
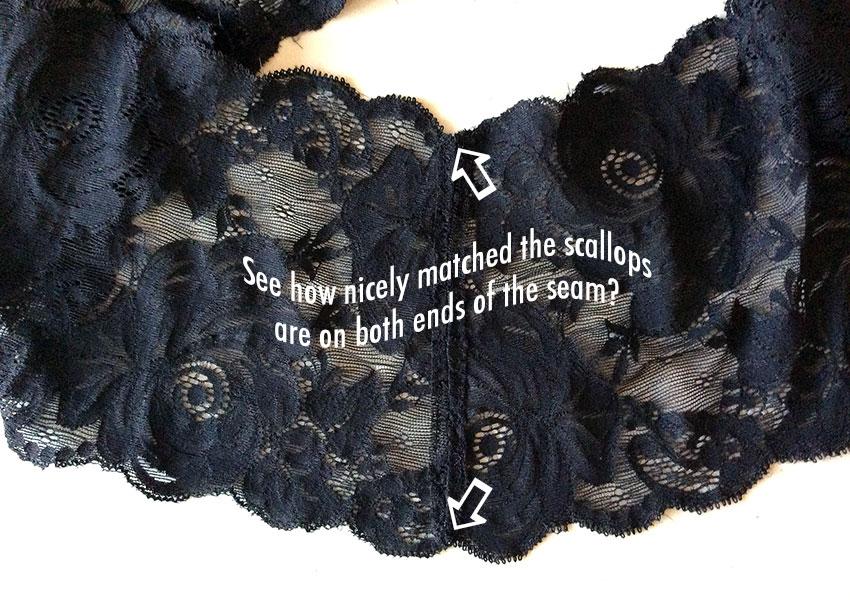
Trimming the excess lace away after topstitching:

I’ll repeat this same seam-topstitching-trimming procedure for the center-back seam.
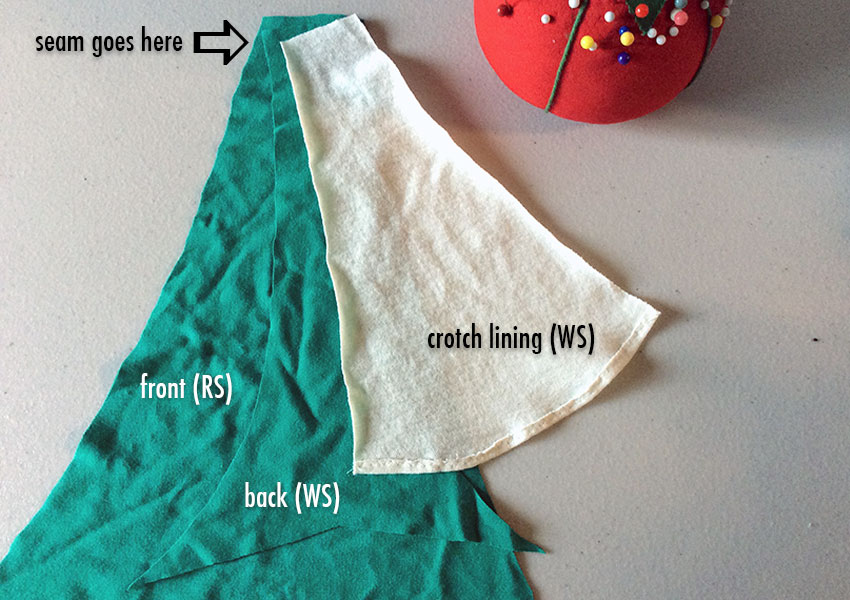
Now I’ll set my lace band aside for a bit, and work on the crotch lining and seam. As for my high-waisted panty, I’m showing you the front, back, and lining piece come together for a completely enclosed seam. (Not to be indelicate, but the crotch is not a place where we want a seam showing. Or chafing.)
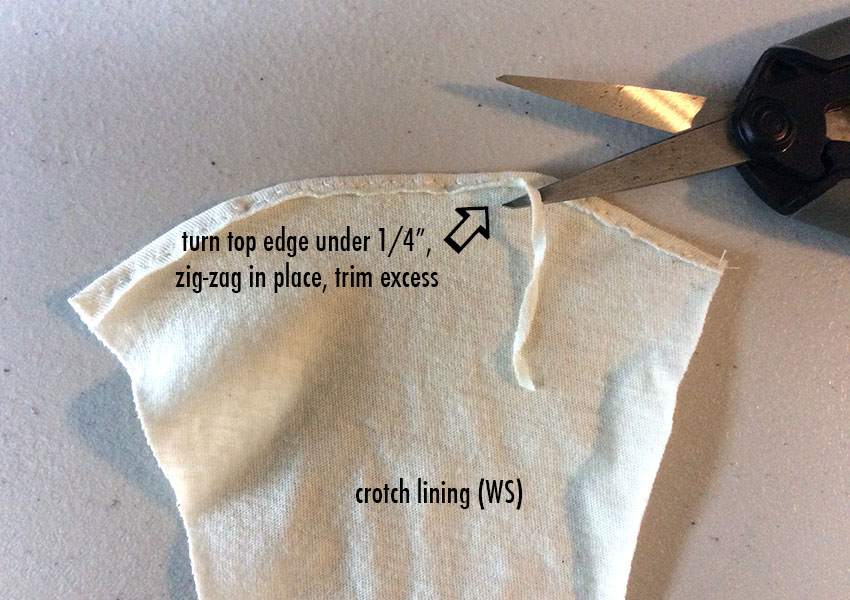
I’ll prepare my crotch lining piece by finishing the top edge.
Tip: Since I started this project with a regular thong pattern (meaning one made entirely out of one fabric), it didn’t occur to me to alter the crotch lining piece. After working on this one, I’m thinking that next time, I might just cut the crotch lining the same as my front fabric piece, and treat the 2 layers as one.
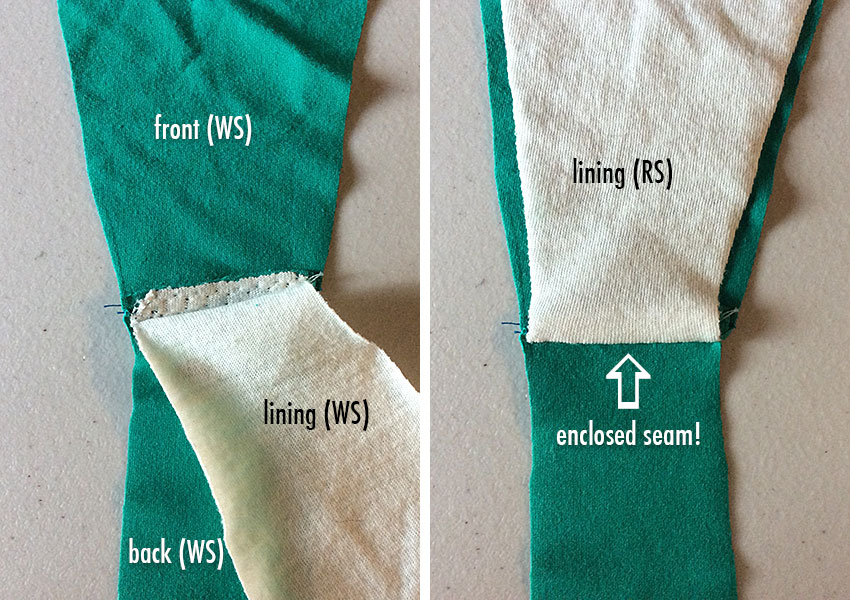
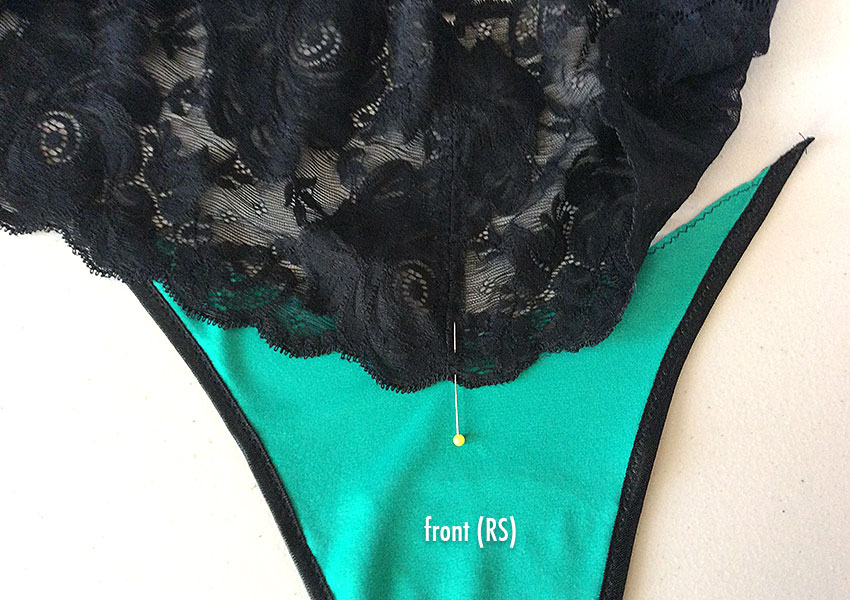
Here’s how the 3 layers (front, back, lining) go together to create the enclosed seam:
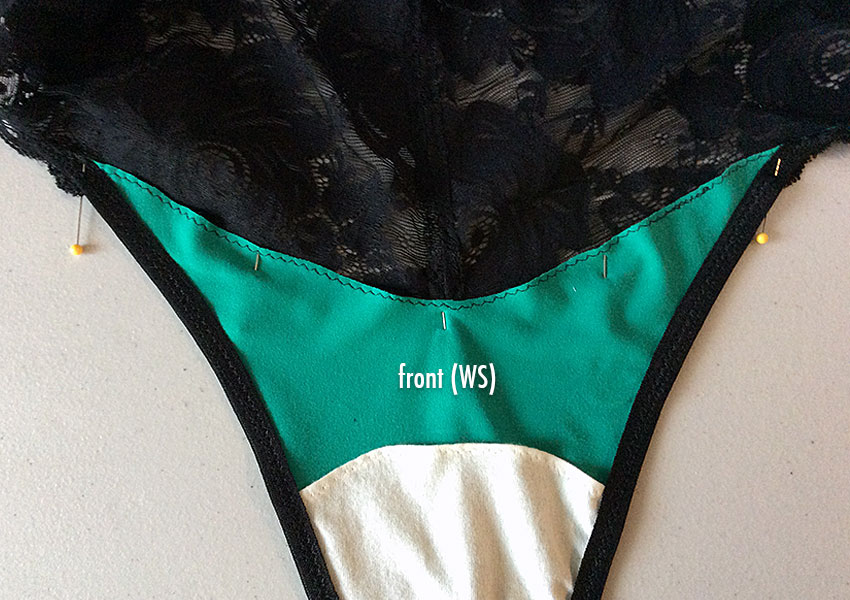
After stitching the seam (through all 3 layers), and finishing the seam by zig-zagging, you can see the result: a beautifully enclosed seam.
In case you were wondering, here’s a look at how the crotch lining is oriented, relative to the front fabric piece. On the left is a detail of stay-stitching the sides of the lining to the front.

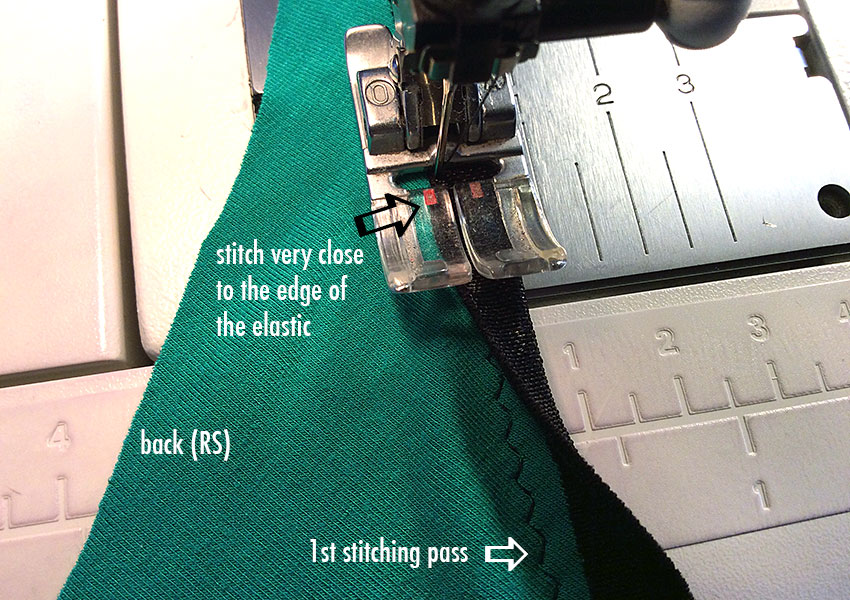
Now I’m going to trim the leg edges of my thong with foldover elastic. Wish me luck— it’s my first time sewing with this kind of trim!
Tip: How long should your elastic pieces be? That depends mostly on how stretchy it is; mine’s fairly stretchy, so I’ve cut my pieces about 2″ shorter than the edges I’ll be sewing them to. This means I will only be stretching my elastic slightly while sewing it down; it’s a good general rule with elastic to stretch it a little more in the curvier areas.

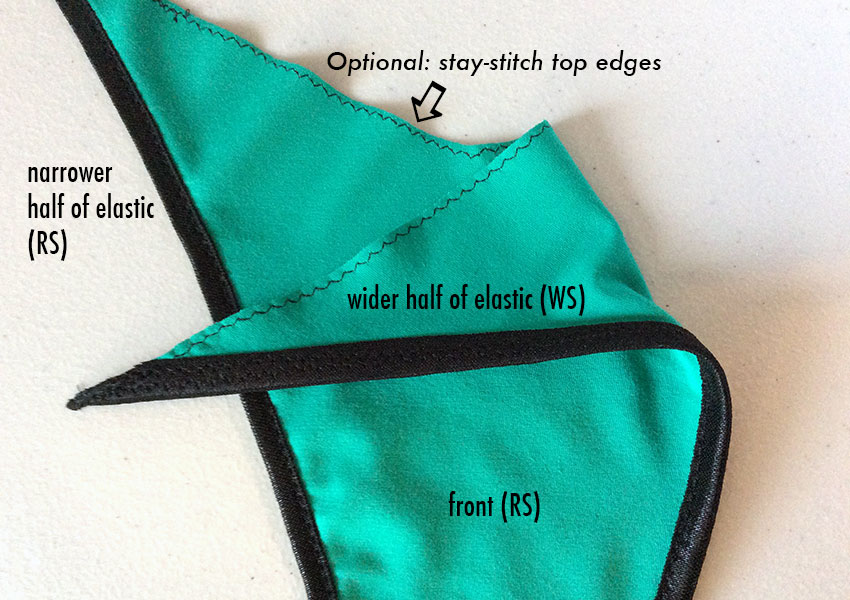
Important: When you fold your foldover elastic in half, you will see that one side is a tiny bit wider than the other; this is to ensure that when you fold the elastic over to make the second stitching pass, your stitching will stay within the boundary of the elastic on the other side. If you look at the very top of the piece in the above photo, you can just make out that the edge of the fabric looks like it’s a bit closer to the right edge of the elastic than to the left edge; this is what you want! Meaning: the wider half of the elastic goes on the wrong side. (See second photo below.) Actually, I didn’t realize this myself until after sewing on my trim, but I somehow got lucky and put it on the right way!
Stitching the second pass, after folding my elastic over the raw fabric edge:
Ta-da! My first foldover elastic trim is finished!
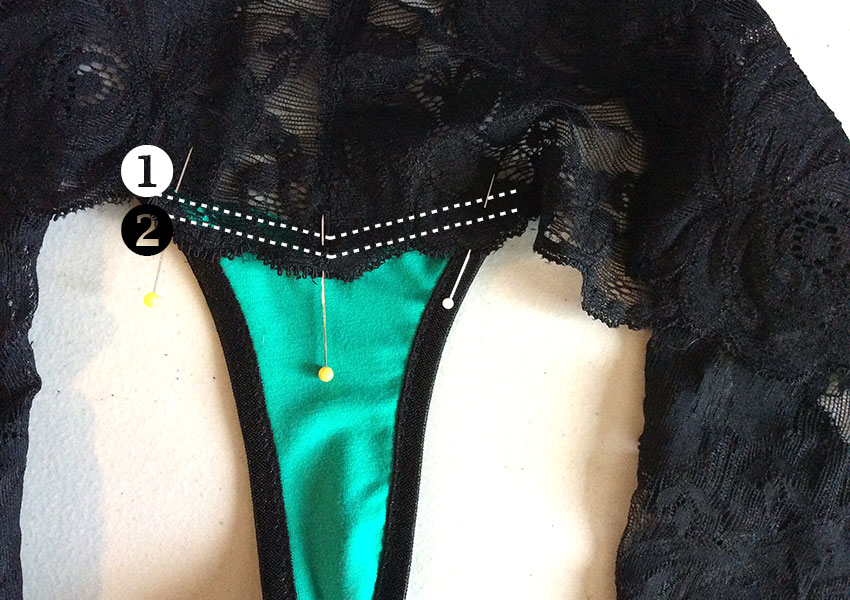
Almost done— I just have to sew my lace band to the tops of the front and back pieces!
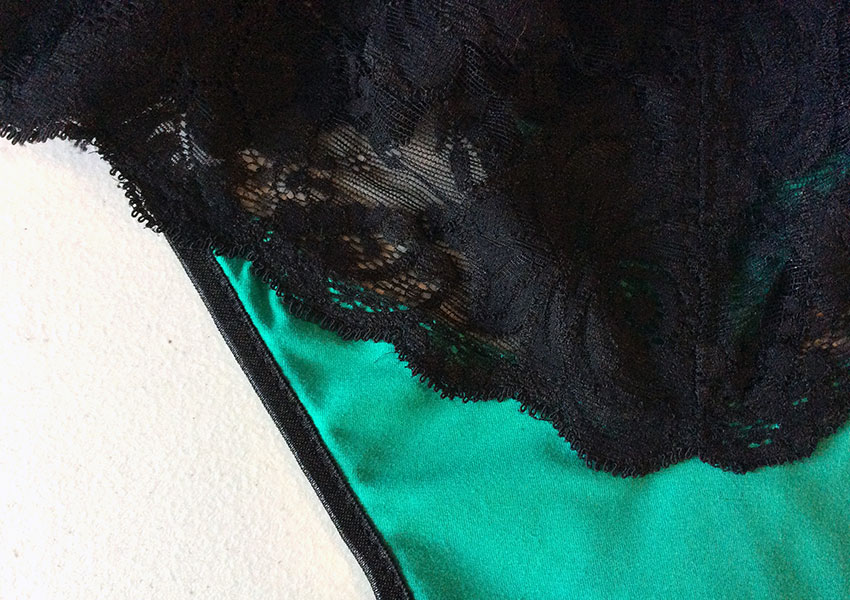
It’s done!

And guess what? My new thong coordinates perfectly with my second bra!

That’s it— my thong story is done! I hope you’ve found this tutorial useful, and I’d love to know what lingerie projects you’re working on!
Next up: What lingerie do you actually need?
In case you missed my last post, in which I started this thong project, and showed how to modify a basic thong pattern into this lace-trimmed version, click here.
And to find out how to shorten a lace waistband that’s just too big (oops!), click here.

[…] Okay! The pattern modifications have been made, fabric and lace cut, lace miters pinned, and trim chosen. All I have to do now is sew my thong together— that’s coming up in my next post! […]
LikeLike
[…] Now I just need to sew the new center back seam, and re-attach it to the panty part; you’ll find instructions for these steps in my sewing-your-thong post. […]
LikeLike
[…] I’ve now made 2 high-waist panties, and 1 lace-trimmed thong, so I’m going to make a bikini-style panty this time. (This is one of 4 panty styles included […]
LikeLike
[…] follow-up about the bikini panty I made to go with it. I’ve used the same pattern as for my thong, Kwik-Sew 3881, which includes a total of 4 styles; hipsters and briefs are the other […]
LikeLike
That was quite interesting, and very detailed. I am anxious also to start making panties. Just waiting for a pattern to arrive in the mail! Thanks for the great tutorial!
LikeLiked by 1 person