Bra! I meant my fourth bra! For my third, I know I said that was something completely different, and it was, especially compared to my first and second, which were both made from the same pattern. But for this one, I went even further afield. I didn’t just try a new pattern, I made a foam-lined bra!

To be honest, I’ve hesitated to make this type of bra, mostly because I didn’t know how flattering it would be on me. As a larger-busted woman, anything that hints at padding runs the risk of creating a too-round shape (definitely not my preference). However, I decided to take the plunge (you should pardon the expression) because this pattern has a multi-part cup— generally a sign that structural shaping is built into the design.
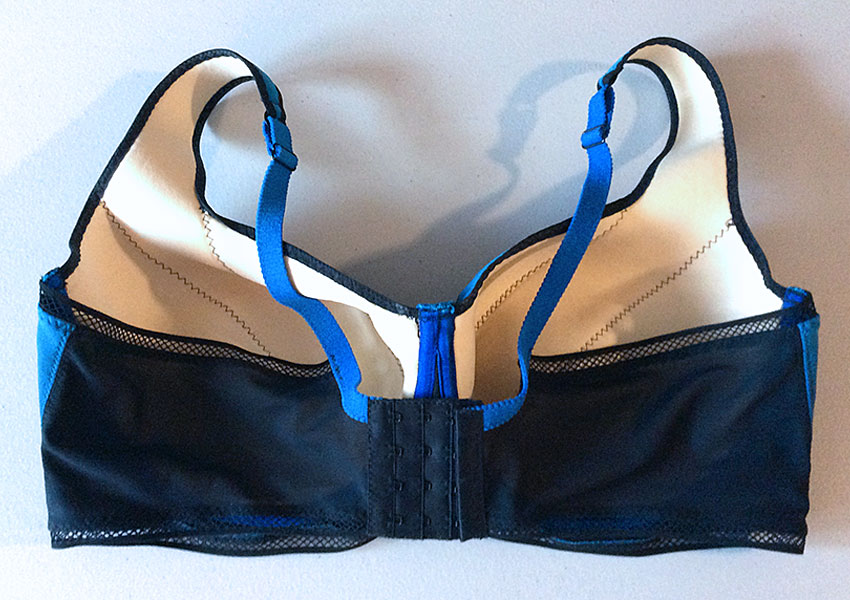
I don’t even know what made me think of using the blue-to-black ombré fabric, but I’m really glad I did. For some reason, it’s been difficult to get good photos of this fabric, but I think you can at least see it on the center part of the cup that extends up into the front strap— it goes from dark at the bottom of the cup to bright blue at the top of the strap! I also cut the bridge/frame piece (the part surrounding the cups) from the ombré part of the fabric.
This fabric is also unusual in that it’s reversible: one side is mostly black with ombré sections changing to blue, and the other side is solid bright blue. So I cut the side cup pieces out of the black, and the center cup pieces out of the blue.
Here’s more or less how I laid out my pattern pieces (I say more or less because I straightened them somewhat when I actually pinned them):

Tip: In case you were wondering about the way the pattern pieces look, I traced the original pattern onto tissue paper. I pretty much always do this anymore, since it allows me to easily make alterations to pattern pieces without ruining the original. I also like to color-code my pattern markings.
Once this bra started coming together, I started thinking it really looks like either a sports bra or a swimsuit top. Or their love child. This is why I decided to use the unusual mesh elastic for the main trim, rather than the usual picot-edge elastic; it just seems sportier, maybe a little edgier. I think it really suits this bra.

You’ll probably find this hard to believe, but I actually did follow the pattern this time! (I’m trying to do that more when using a pattern for the first time, but I have to confess that my inclination is to change various things to suit myself. Hey, isn’t that why we like making our own stuff?) The only thing I didn’t do was put boning on the side seams; I may add that later to this bra, or put it on when I make the next version of this pattern. With a band this wide, I can see how boning would be beneficial.
Here’s a look at the front and back straps connecting:

At right in the photo above, you can see black foldover elastic trim on both sides of the padded part of the strap; this continues down around the underarm and neckline edges of the cups, and meets the mesh elastic trim at the side seams. Foldover elastic is really growing on me as a trim; it’s easy to apply, is soft next to the skin (love it for panties too), and gives a sleek, polished look to this bra.
Now I’m going to go see if I have enough of this ombré fabric left to make a matching panty!
Tip: This bra pattern, DL02 from MakeBra.com, is available as a downloadable PDF. You can just order a single size, or a multi-size, as I did, which included 2 sizes in addition to your usual size, for a slightly higher price.
It comes with a 2-page sheet with helpful tips for making your bra, but I wouldn’t call that full instructions. They have a good tutorial on their website:
http://www.makebra.com/instructions/sewing-bra-dl02/
Update: I’ve now got one (just one) materials kit available to make this very bra!

Beautiful! The colors are gorgeous! You are really cranking out the bras.
LikeLiked by 1 person
Thank you! Bras are turning out to be some of the quickest sewing projects I’ve ever done– it’s kind of addicting!
LikeLike
[…] one side, and black-to-blue ombré on the other, a new panty pattern, and it’s going to match my ombré foam-lined bra that I just […]
LikeLike
[…] for 2 of them), and super-soft bra strap elastic, which I’ve dyed to use on my second and fourth […]
LikeLike
Oh, lovely!
LikeLiked by 1 person