DANGER: Crash course ahead! Be advised that reading this post involves a distinct risk of dyeing. Color-mixing may be addictive, ombré effects can become an obsession, and friends may beg you to dye for them. Before proceeding through the following, ask yourself if you can handle the risks. Then ask your blogger if dyeing is right for you.
I’ve done several posts that at least touched on dyeing various bra parts, plus my most recent project, ombré-dyeing an entire bra. So I’ve decided it’s about time I included a few tips on the art of dyeing gracefully.


Aside: I feel I owe it to you to apologize right now for all the bad puns on dyeing. End of aside.
Part 1: Dye types
For general home-dyeing use, there are 4 main categories of dyes:
- Acid dyes
- Fiber-reactive dyes
- Natural dyes
- Union dyes
Note: There are other dye types out there, such as a specialized formula that’s used for leather and other skins, but for now, I’m just going to focus on these 4, since they’re the most widely available for the casual user, and also the most commonly used for fibers, fabrics, clothing, and accessories.
Here are brief summaries of what I’ve learned about these four dye types:
- Acid dyes. Contrary to what this term conjures up (nightmare visions of caustic chemicals burning skin off my hands, but maybe that’s just me), these dyes do not actually contain acid; acid, usually in the form of either vinegar or citric acid, is added during the dyeing process, which causes the pigment (color) to bond with the fiber. (Also contrary to the implied harshness: when I’ve tested my dye mixtures with pH test strips, I’ve found that they are not any more acidic than your average vinaigrette. Which we eat.) Acid dyes are used to dye protein fibers (animal fibers: wool, alpaca, silk, mohair, angora, camel hair, etc.) and somewhat surprisingly, nylon.
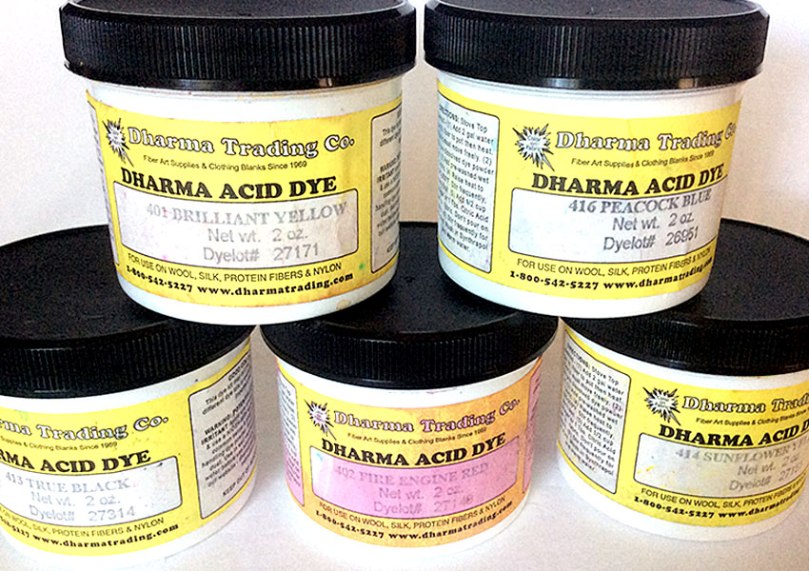
My acid-dye primaries (clockwise from upper left): Brilliant Yellow, Peacock Blue, Sunflower Yellow (yes, 2 different yellows), Fire Engine Red, and True Black. I mix nearly all my own colors from these. Acid dyes are used for animal fibers (wool, alpaca, mohair, silk) and nylon. - Fiber-reactive dyes. Unlike acid dyes, these dyes require alkalinity to bond pigment to fiber; soda ash is commonly added to the dye bath to accomplish this part of the process. Fiber-reactive dyes are used for plant-based fibers (cotton, linen, rayon, bamboo, etc.).
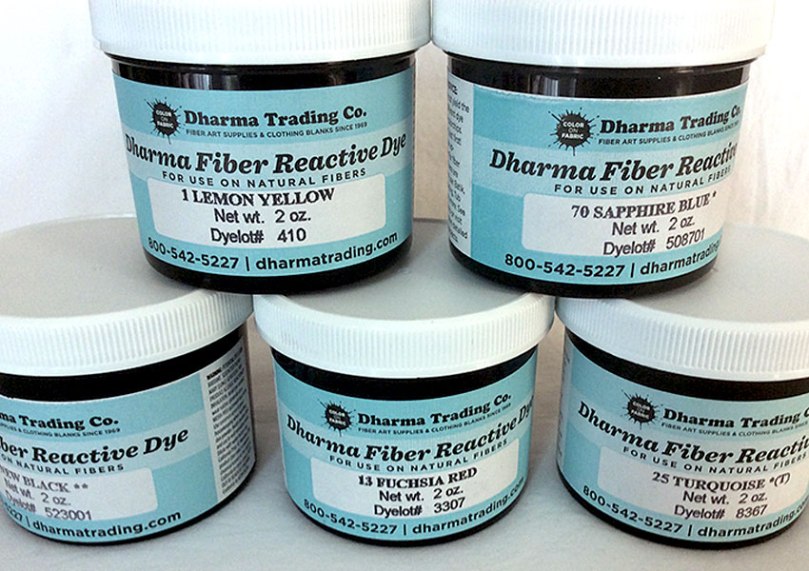
Fiber-reactive dyes, used for plant-based fibers: cotton, linen, rayon. My primary colors (clockwise from upper left): Lemon Yellow, Sapphire Blue, New Black, Fuchsia Red, and Turquoise. - Natural dyes. Despite the rather benign association we have with the word “natural”, what I’ve read about using natural dyes is that, while the material used for the color (flowers, roots, etc.) may not be harmful in itself, the dyeing process requires use of mordants, which are the fixatives that bond the color to the fiber— and many commonly-used mordants have been taken off the market because of unacceptable toxicity levels. Natural dyes can be used with a wide variety of animal-based and plant-based fibers; the mordants required will vary depending on the fiber.
- Union dyes. Rit dyes, along with others commonly found in craft stores these days, are usually union dyes; the term refers to the dye formula containing both acid and fiber-reactive pigments, so you can successfully dye either animal-based or plant-based fibers (or both at the same time); however, if you’re dyeing, say, cotton jeans, the fiber-reactive part of a union dye is the only part that will bond with the cotton fiber, leaving a lot of leftover dye.
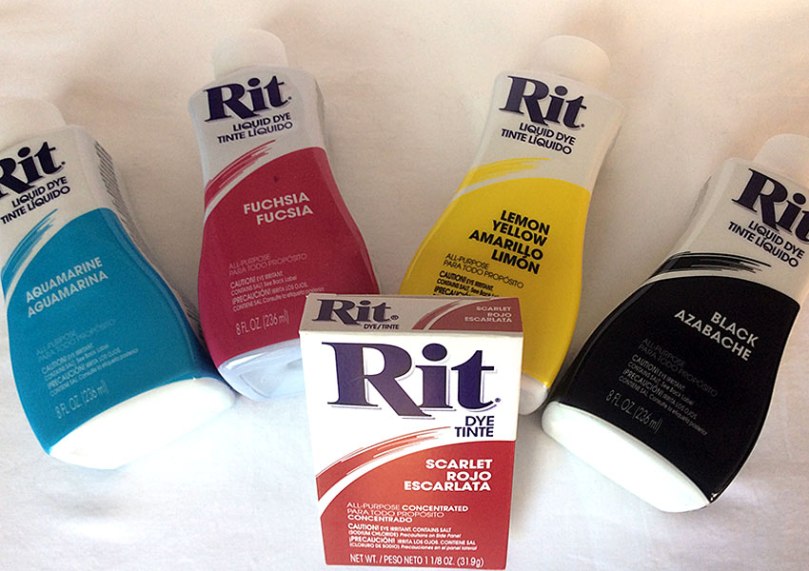
My liquid RIT primary dyes (top): Aquamarine, Fuchsia, Lemon Yellow, and Black. Also shown (bottom): Scarlet, in powder form. These versatile dyes can be used to dye any combination of plant and animal fibers, plus nylon.
Note: Please understand that I’m not trying to encourage or discourage using any of the above types of dyes; I’m simply pointing out that, in order to make an informed decision about what type is appropriate, it’s good to know not only the uses for each, but also the advantages and disadvantages of each. I could probably fill a year’s worth of blog posts just exploring these areas in more depth, relative to all of these four dye types, but for this blog’s purposes, I’m going to concentrate on acid and union dyes, since these are most useful for my lingerie-dyeing projects.
Part 2: What dye types are good for lingerie?
Well, since one of the primary fibers used in lingerie fabrics is nylon, I like to use my acid dyes (hey, I’m used to them, and they’re easier to use than any other type I’ve tried). Things get trickier when a bra or panty is made with a combination of fibers; for example, all the panties I’ve made so far have been made of mostly nylon/Spandex-type fabrics, but I use cotton knit for crotch linings— and acid dyes don’t work on cotton. So RIT (union) dyes are most appropriate. And if you’re dyeing a matching bra and panty that are made with a mix of fibers, using a union dye for both should give you a good result.
That reminds me: I may not have had a lot of experience (yet) with dyeing lingerie, but I do have quite a bit of experience with dyeing yarns of many different fibers, and I can tell you that it’s unrealistic to expect that different fabrics, even those made with the exact same fibers (e.g. 100% nylon), will end up looking like the exact same color. There are many reasons for this. For one, the finish of the fabric makes a difference; shiny ones reflect more light, so you’ll perceive their colors differently than matte fabrics. Also, if the percentage of nylon varies between fabrics, that will affect the results.
The point is, with all the varied materials that go into making a typical bra (my usual checklist has 10), it’s unlikely that they will all end up exactly the same color, even when they’re all dyed in the same dyebath. (Check out this example.) I say, vive la différence! I think my bras and panties are all the more interesting as a result.
Tip: Where I get my dyes, citric acid, etc.: I like Dharma Trading. I’ve been using their acid dyes since I started dyeing, and I’ve more recently tried their fiber-reactive dyes. I also love their huge selection of dyeable things, from silk fabrics to wool yarns. It’s virtually a one-stop-shopping site, made even better by their extensive tutorials!
Part 3: Preparing to dye
The most important thing is safety (duh). The basic prep steps:
- Cover everything up that you don’t want dyed.
- Cover yourself up (gloves, dust mask, apron, the works).
- Dedicate utensils, pots, etc., to dyeing use only; never use them for food.
- Pre-soak the items you’ll be dyeing; this helps the dye to penetrate evenly. When I’m using acid dyes, I pre-soak in a mixture of lukewarm water, citric acid, and a tiny bit of gentle detergent (I use Synthrapol). If I’m using RIT dyes on cotton or rayon, I’ll use salt in this mixture instead of citric acid.
- While pre-soaking, mix your dyes (unless you’re using pre-mixed liquid dyes). You can use strips of absorbent paper (I like coffee filters) to test the colors.
- Add dye mixture (DM) to water in your dyepot; make sure there’s more than enough water to completely cover the item(s) you’re dyeing.
Tip: If you’re not sure how much DM to add to your dyebath, start with less than you think; you can always add more, but you can’t take it out once it’s in! RIT’s website has a great color-mixing tutorial, as well as as amazing library of color “recipes”.
- Be prepared for this process to take at least a few hours; it might not be that long, but you really don’t want to have to stop in the middle to go do errands or something.
And you’re ready to dye! All I can tell you at this point is to follow your dye directions carefully. Care. Ful. Ly.

Bonus lesson: Use your dye — and dyeing time— wisely!

Now that you’ve successfully completed my Dyeing Crash Course, watch for my next project: Dyeing Little White Panties!
Want more dyeing declarations? Check out these posts from my blog Changing Your Clothes!
Resolution 2014: My New Dye-It Regime
If At First You Don’t Succeed… Dye, Dye Again
Disclaimer: I cannot be held responsible for any dyeing that may ensue as a result of reading this post.
Seriously, though: This post obviously doesn’t cover every single detail. There are plenty of good books, online tutorials, etc. (including on Dharma’s site) that will walk you through the finer points. And I’m happy to answer any and all of your questions (natch)!
What I write about dyeing comes from my own experiences. You should treat dyeing like the experimental process that it is, because many factors can influence the results, and accept that your outcome is not guaranteed to be exactly like mine. Heck, I can’t always predict, much less guarantee, my own results! It’s all a glorious, colorful gamble. Have fun! And let me know what happens!

I’d love to see some of your knitting creations! Thanks for sharing about the different dyes. One of these days I’m going to try it.
LikeLiked by 1 person
Thanks, Michelle! You can see my yarns and knitting patterns here: https://www.etsy.com/shop/Knittique?ref=hdr_shop_menu
Do you knit?
LikeLiked by 1 person
I do, but not nearly as much as I sew. 🙂
LikeLike
Your blog was very informative. I’m dying to dye again! You also have some sumptuous yarns. I learned how to knit this last winter off of craftsy. I’ve knit 3 shawls, one with beads. I love knitting. But that’s all on hold now. Bras and panties it is.
LikeLiked by 1 person
I have recently found your blog, and LOVE to find the dyeing articles. My major experience is with Procion, but I have dyed some yarn with acid dyes. One question I have as I imagine it’s pretty critical – when dyeing elastic a to be used for bands and straps etc what temperature water do you use. I could imagine that too hot would completely ruin your elastic a or at least lessen their life in a bra? I am off this weekend for shopping in London for notions etc for my first couple bras and very excited.
Thanks
Sue (London UK)
LikeLike
[…] Tip: For lots more details about dyeing, including what types of dyes to use and when, see my post Dye-IY: A Lesson on Dyeing. […]
LikeLike
[…] After I decided which parts would be either fuchsia, magenta, or blue-violet, it was time to dye! (Sorry.) Since my parts were so small, I decided to dye them in large yogurt containers, adding 1 teaspoon citric acid, and very hot (180°F) water to my dye mixtures; after all the dye was absorbed, I just left them there to cool completely before rinsing and drying. (For more on the basics of dyeing, click here.) […]
LikeLike
[…] *Click here for more about the dyeing process. […]
LikeLike