Finally! After choosing my pattern, deciding which fabrics to use, and dyeing notions and more fabrics to coordinate, now I’m on to the really fun part: sewing it all together! Today, I’ll show you step-by-step how all the major parts are sewn together, and next time, I’ll complete my bra!
Let’s jump right in! Here, I’ve cut all my fabric pieces, and laid them out in a rough mock-up of my new bra.
Note: In the interest of keeping this post to less-than-novella length, it’s not going to be a tutorial, exactly; it’s more in the nature of a quick overview of the steps involved in constructing a bra. In posts to come, I’ll go into a lot more detail about specific aspects of bra-making. (Remember, this is only my second bra!)
Another note: In this photo, the pieces with the print fabric, which is sheer, have already been basted to a second layer of silk, for stability as well as opacity.
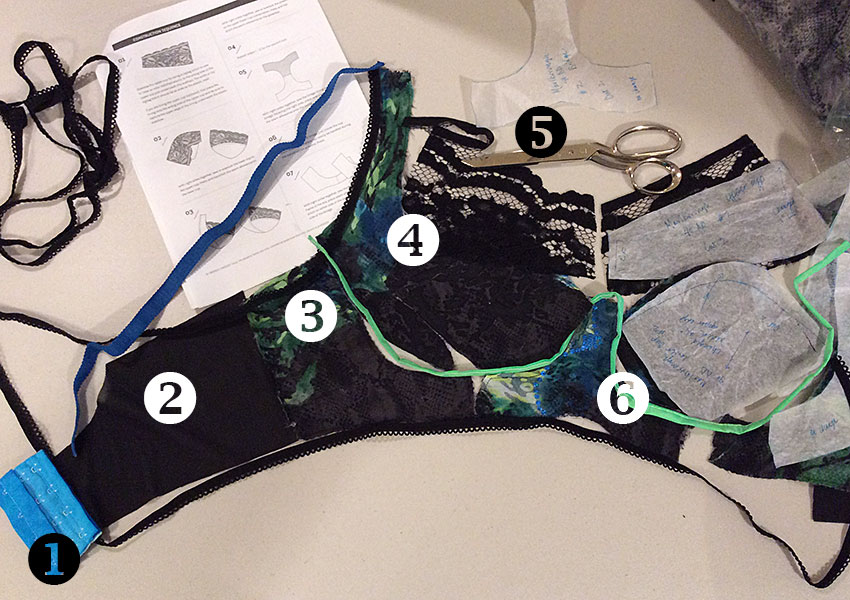
Tip: Laying out the pieces in this way also helps avoid the possibility of forgetting a vital part! Don’t ask me how I know this.
