Finally! After choosing my pattern, deciding which fabrics to use, and dyeing notions and more fabrics to coordinate, now I’m on to the really fun part: sewing it all together! Today, I’ll show you step-by-step how all the major parts are sewn together, and next time, I’ll complete my bra!
Let’s jump right in! Here, I’ve cut all my fabric pieces, and laid them out in a rough mock-up of my new bra.
Note: In the interest of keeping this post to less-than-novella length, it’s not going to be a tutorial, exactly; it’s more in the nature of a quick overview of the steps involved in constructing a bra. In posts to come, I’ll go into a lot more detail about specific aspects of bra-making. (Remember, this is only my second bra!)
Another note: In this photo, the pieces with the print fabric, which is sheer, have already been basted to a second layer of silk, for stability as well as opacity.
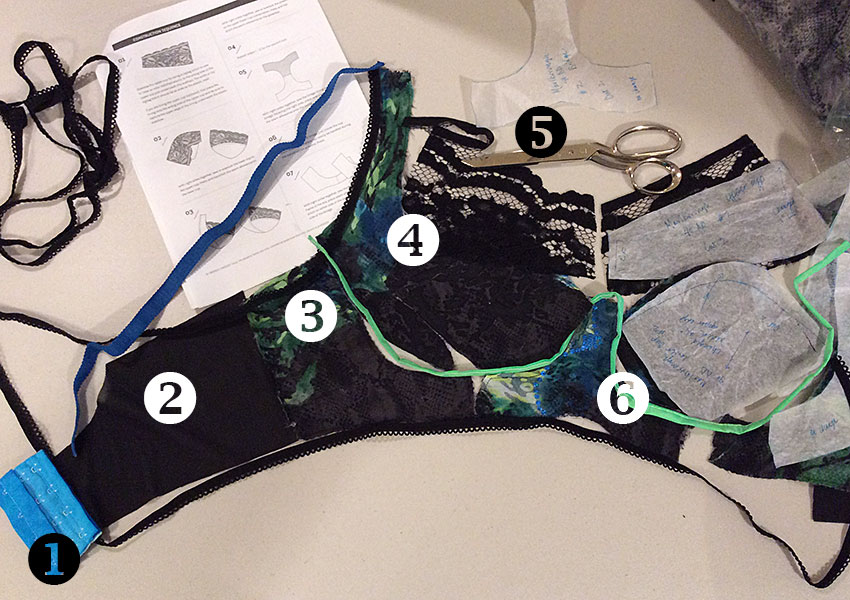
Tip: Laying out the pieces in this way also helps avoid the possibility of forgetting a vital part! Don’t ask me how I know this.
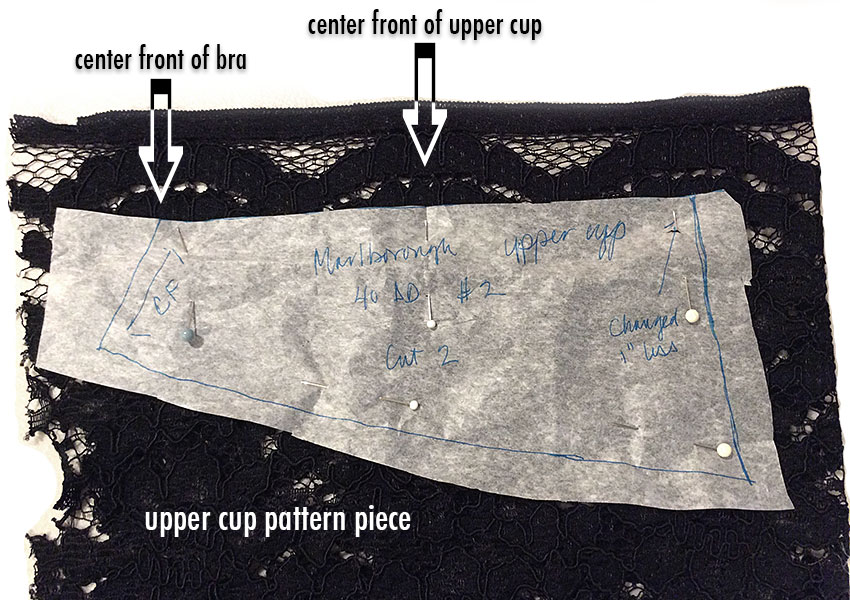
Let me back up for a minute to the cutting phase. If you’re using lace for your upper cups, as I am here, think about the placement of the scallops, and about making the 2 cups symmetrical; this is one easy way to give your bra a professional finish. (Many bra manufacturers don’t bother with this detail.) Here, I’ve pinned my upper-cup pattern piece to 2 layers of lace, with the scallops of each layer lined up:
And moving on, the first sewing step is to assemble the cups. My pattern, the Marlborough Bra from Orange Lingerie, is designed with a 3-part cup: upper cup, lower cup, and power bar. I’ll sew the upper and lower cups together first:

Now I’ll sew on the power bars.

Here’s a detail of the topstitching on the powerbar-to-cup seam:

Tip: When you’re combining fabrics with different textures and weights, as I am here, having a consistent touch like topstitching really helps to unify the overall look.
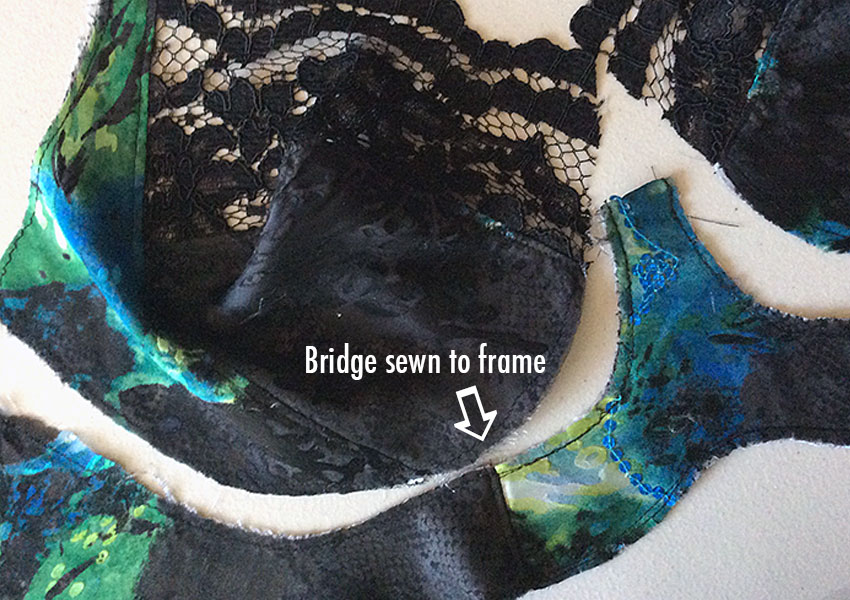
Next, I’ll stitch the frame and bridge together:
And now, I can sew the cups into the frame!
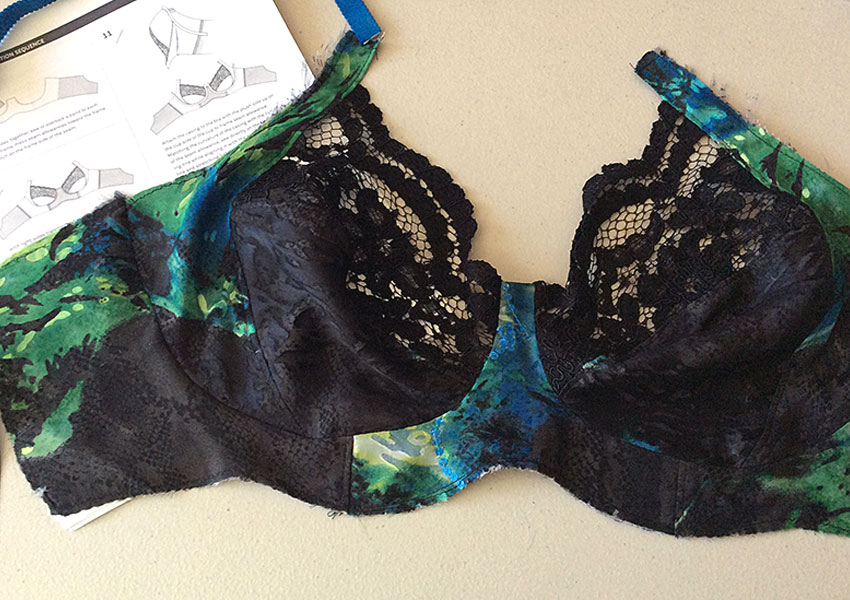
Here’s a closer look:

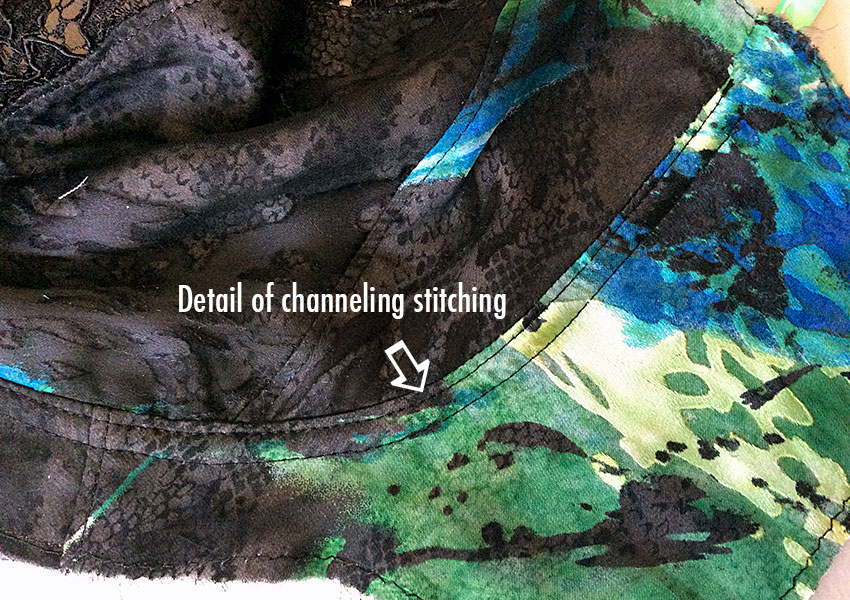
Now it’s time to start sewing the channeling in place; this is what will house the underwires.
Tip: Toward the outside edges of each cup, you can see that I’ve stopped stitching the channeling about 3/4″ from the edge of the frame; this is to facilitate sewing on the elastic trim later on. I’ll finish up that step in my next post.

Here’s how those 2 rows of stitching look on the outside:
And lastly (for today, that is), I’m sewing on the back bands, like so:

Okay! The major parts of my second bra are now sewn together and looking good! Now it just needs some beautiful finishing touches (and a little hardware): straps, elastic trim, and a back closure. I’ll show you all those final bits next time, followed by step-by-step photos of making a high-waisted panty to coordinate with this bra!

[…] Part 3 of my second bra project, we ended after adding the back bands. Now all we have to do is add the finishing touches: elastic […]
LikeLike
[…] Next up: Yes, I’m finally going to start making my second bra! […]
LikeLike