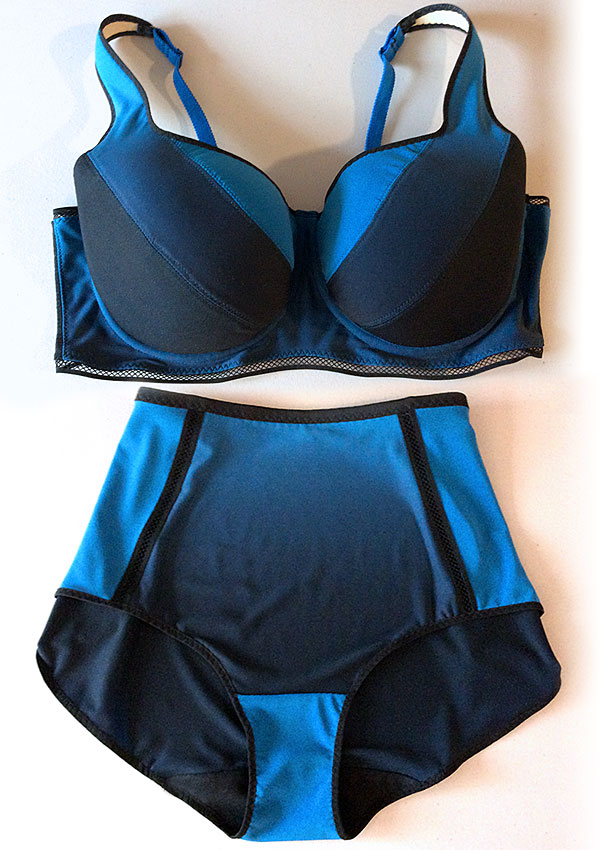
This project really is exciting— a gorgeous, reversible fabric that’s solid blue on one side, and black-to-blue ombré on the other, a new panty pattern, and it’s going to match my ombré foam-lined bra that I just finished!
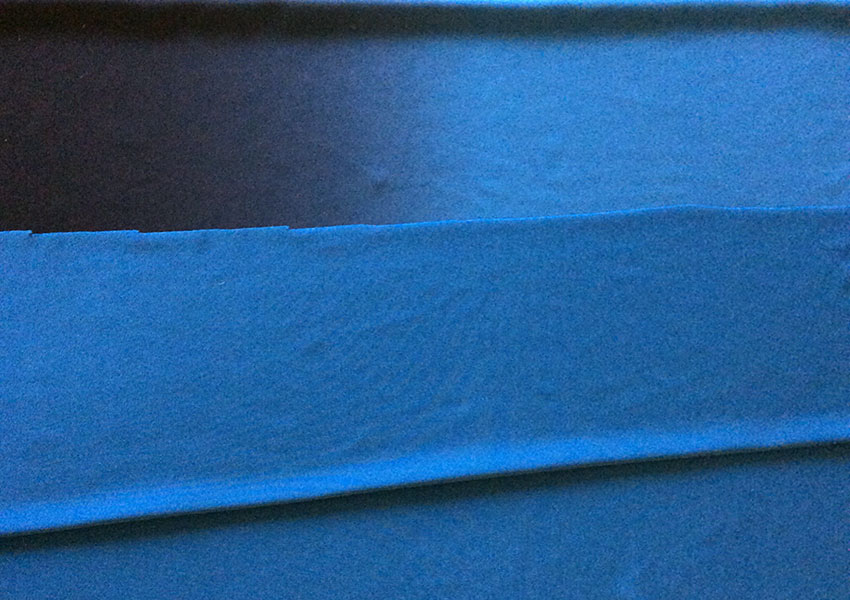
Let’s get right to it! First, here’s a look at the fabric, a 95% nylon/5% Spandex matte jersey.
Remember me talking about doing a mock-up of each new project? I especially like doing this when I’m working with a new pattern; it helps me visualize how the various parts will go together, and it also gives me a chance to try out trim ideas, as I’ll show you.
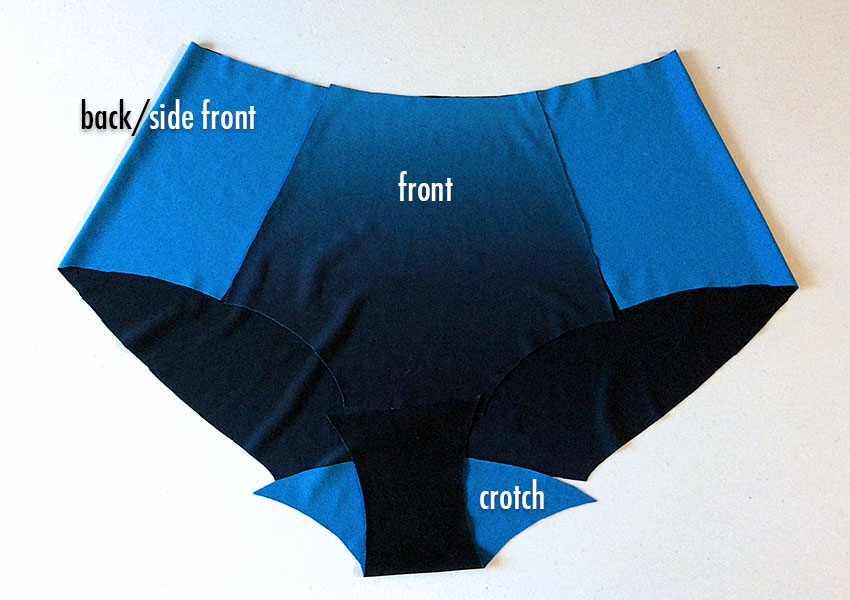
Resource: The panty pattern I’m trying here is DL21 from MakeBra (the same company that makes my ombré bra pattern). I really like that there are no side seams; the back piece continues around the sides into side front panels, connecting with the front panel. This should make it not only easier to sew, but more comfortable to wear, and smoother under clothes.)
Right away, I’ve got a great visual idea of how to proceed. But before I start sewing, I want to confirm the elastic trims I’ll be using. Ooh, look what I found!
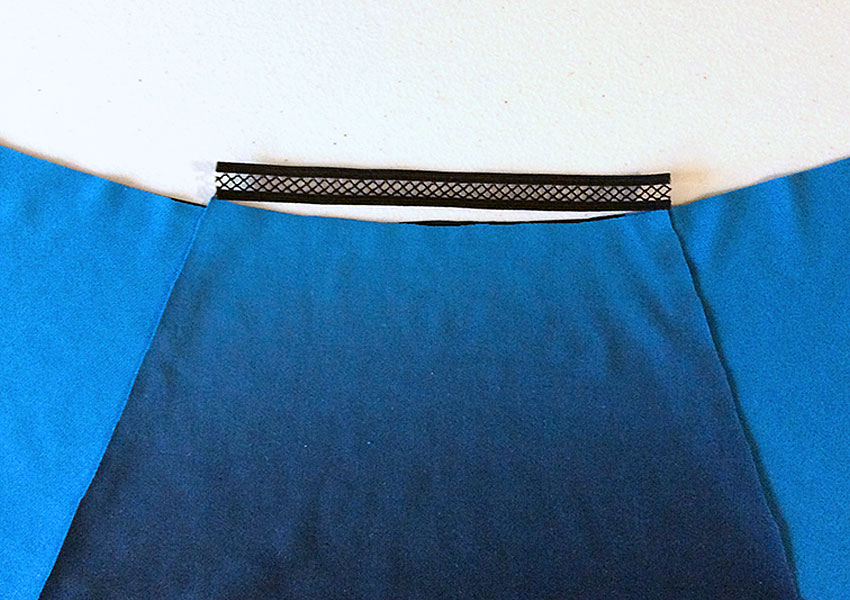
So I was liking the idea of incorporating this trim into the panty, but got hung up trying to figure out how to insert this piece into part of the waistband, while doing the rest of the band with foldover elastic; I couldn’t see how to do it without seaming the 2 different elastics together. And I don’t like the idea of that additional bulk at the waistband. What to do…
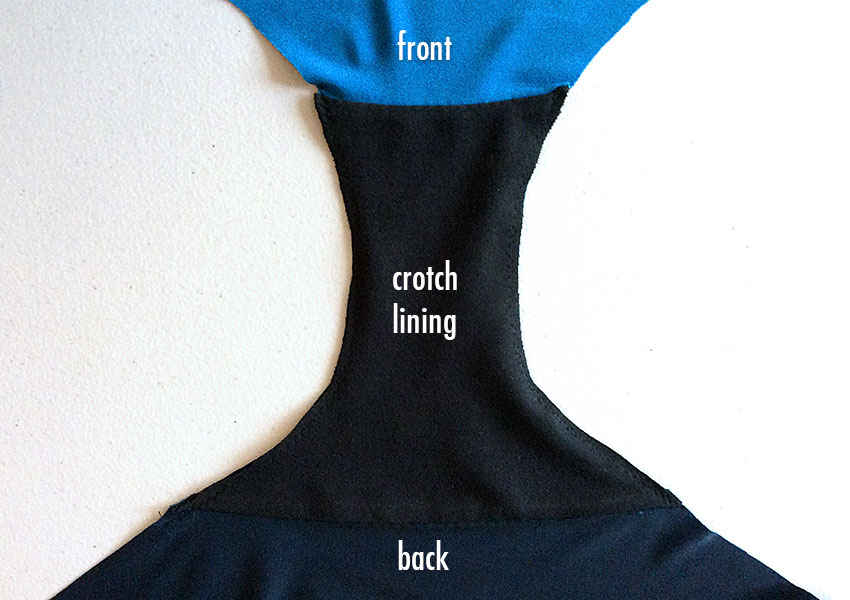
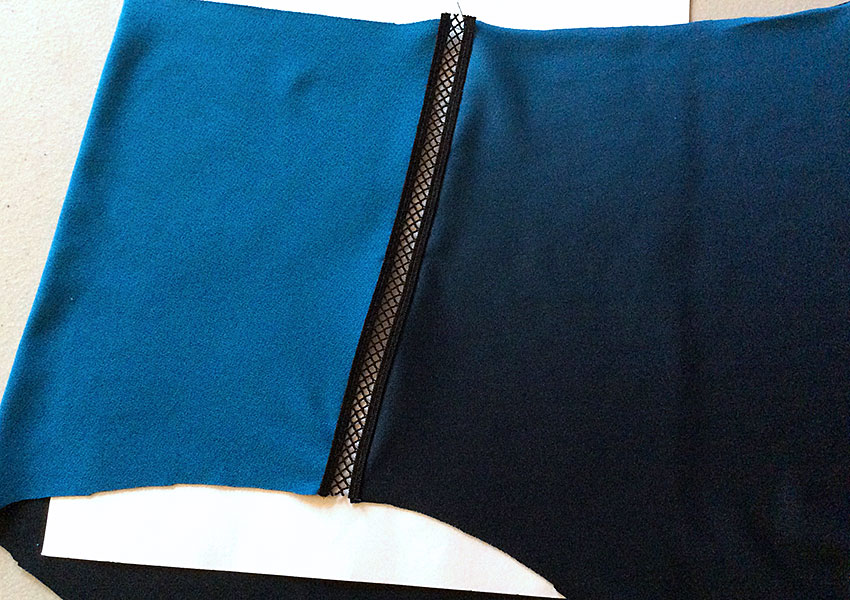
This is where it’s so handy to have all the pieces laid out in front of me: it suddenly came to me that I could put the trim into the front seams, rather than at the top, thus:
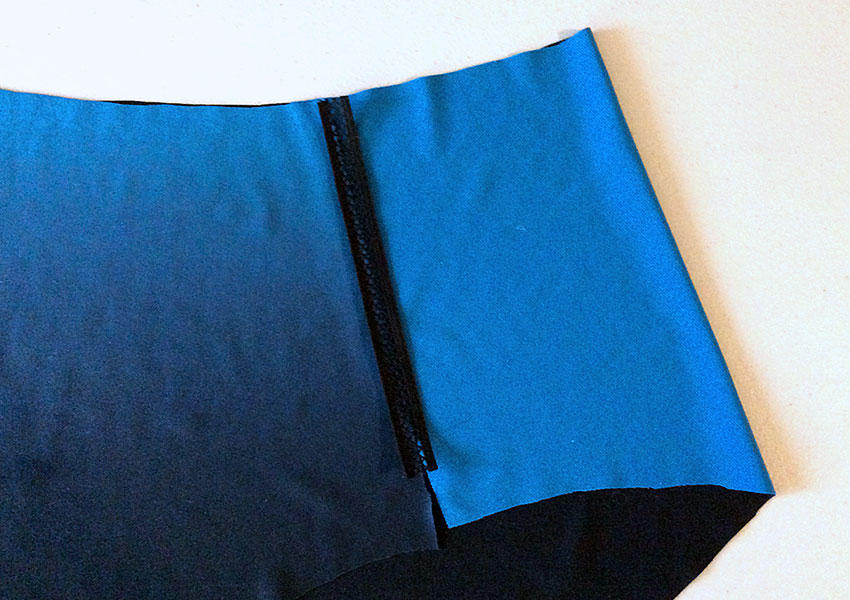
After a mad dash to the fabric store to see if they had more of this trim, I’m back, victorious! And it has also occurred to me on the way that if I apply this trim over the seam allowances, then trim away the excess allowance, you’ll be able to see through a little of the mesh part of this trim. But wait, there’s more: applying the trim in this way means no actual seams, which means everything will lay nice and flat! Huzzah!

Tip: When I refer to the width of foldover elastic, I mean the total width, before sewing it on.
Before I put on my mesh trim, I think I’d better take care of the crotch lining. Since this pattern has a separate crotch piece (meaning it gets seamed to the panty at both ends), I’m going to use my both-seams-enclosed method for a nice finish. You can find complete instructions for this method in this panty post.
Here’s the inside of the crotch after sewing both enclosed seams:
Tip: After finishing the crotch seams, stay-stitch the crotch lining layer to the outside crotch piece, 1/8″ from the edge; this will make it much easier to put on the elastic trim a little later.
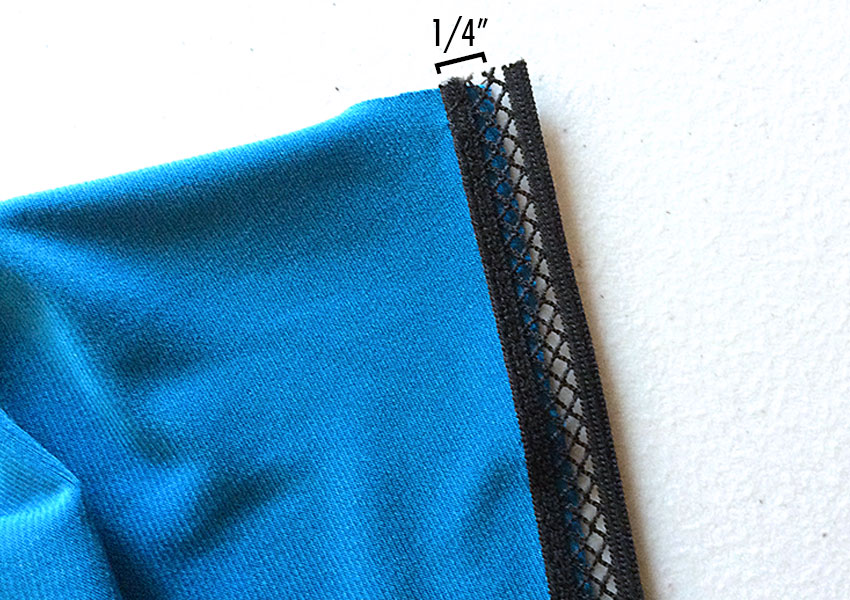
Now that the crotch is sewn, I’ll show you how to apply the mesh trim to the seams. Since my seam allowances are 1/4″ in, and the trim itself is 1/2″ wide, I’m simply going to zig-zag over the solid edge of my trim, positioning it right on the seamline:
Do the same thing on the other side of the trim:
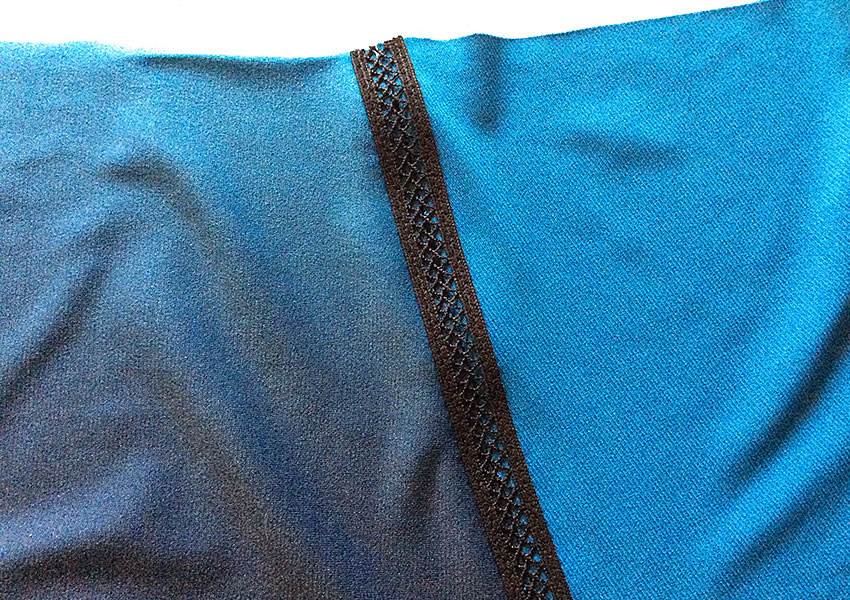

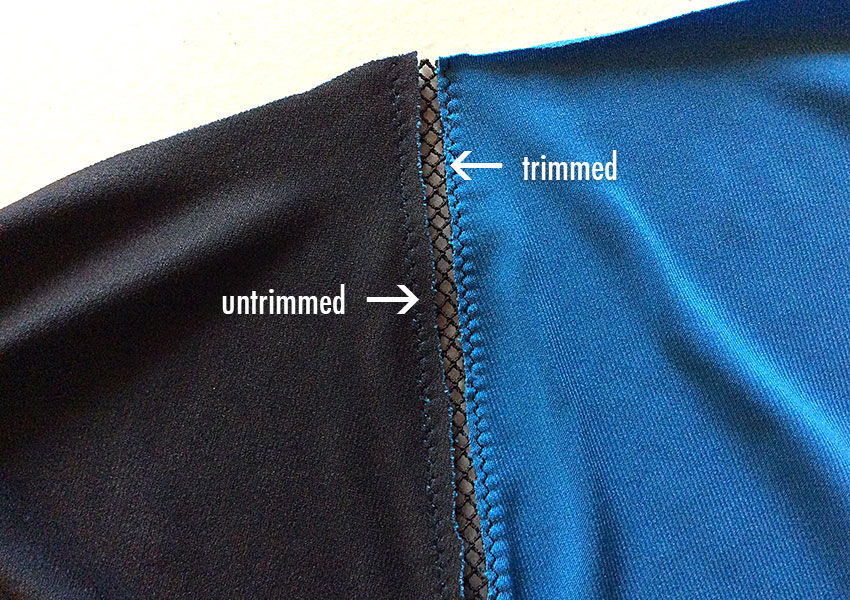
I trimmed the remaining 3 seam allowances in the same way (I had to take this quite slowly), then turned the panty right-side out to see what it looks like.
Tip: This method can be used to insert many kinds of trim into seamlines, like lace or embroidered tulle, as long as your trim has straight edges on both sides. And it doesn’t necessarily have to be stretchy; my mesh trim happens to be elastic (which was great for trimming the matching bra), but you could also use a non-stretch trim strategically to create stability in seams.
All I have left to do is to put the foldover elastic on the waist and leg edges, then I’m done! You can find complete instructions for applying foldover elastic in this panty post.
That’s it— an amazing-looking panty to go with my ombré bra!
Resources for this project:
Panty pattern DL21 from MakeBra.com.
Ombré jersey fabric, mesh elastic trim, cotton knit (for crotch lining) and 1″ foldover elastic (FOE) came from one of my local fabric stores, Mill End.
5/8″ FOE (used on leg openings) came from Sew Sassy’s online store.
Update: A kit to make this panty yourself is now available!

[…] Panty. You may recognize this pattern; it’s MakeBra’s DL21, the same one I used for my Ombré Panty. What a difference a fabric choice […]
LikeLike
Does this pattern have good coverage in the back side or do you have to alter it? Also , I just made a pair of panties from a pattern that was ridiculously small. Does this run true to size, as I wouldn’t mind purchasing this pattern.
LikeLike
Well, I’m fairly curvy, so the first one I made (the Ombre Panty) didn’t cover me completely. So for my LWP, I added a little to the back legs, which makes them perfect. I’m finding that panties can take almost as much tweaking as bras. This pattern comes with multiple sizes, by the way. I love this style, and it’s easy to make.
LikeLike
What was the pattern you used that was too small?
LikeLike
[…] the upper cup all the way across the back band, and finishes at the same point on the other cup. (This post has a tutorial for applying […]
LikeLike