Remember my Little White Bra project, after it was dyed? Well, today is all about its coordinating Little White Panty! I’ll show you how I made it, along with a Little White Thong; in my next post, I’ll show you how I dyed them. (Teaser alert: I used 2 different techniques— but they both work with my ombré-dyed LWB!) And coming soon: I’ll show you 3 different ways to apply the same dye colors I used for all my Little White projects, so you can make a complete set of coordinating (not matchy-matchy) lingerie pieces!
Let’s start with the Little White Panty. You may recognize this pattern; it’s MakeBra’s DL21, the same one I used for my Ombré Panty. What a difference a fabric choice makes!

When I started the Little White project series, my main objective was to experiment with different ways of using dye colors; my hope was that a nicely color-coordinated set would be the result, without all the hassle of trying (usually in vain) to reproduce the exact same color over and over.
Tip: As I’ve said before, when you’re working with so many different types of materials in a single garment like a bra, it’s virtually impossible to get uniform color results; each material will absorb the dye a little differently from the others. Honestly, it’s just easier to accept that there will be a subtle range of color tones. Or maybe I’m just lazy. Huh.
Sewing the LWP: It’s basically the same as making the Ombré one. The only major difference is that the Ombré Panty is all made with one main fabric; this LWP combines several. I used the floral lace for the main piece (sides/back piece), and for the front panel, I put a layer of powernet behind a layer of Swiss dot (a sheer mesh); I stay-stitched these 2 layers together prior to sewing the panty. Adding the powernet was partly to stabilize the soft, stretchy Swiss dot, and partly to provide some support. Oh, and I also put on a flower embellishment just for fun. (Okay, I really did that to see if it would dye or not.)

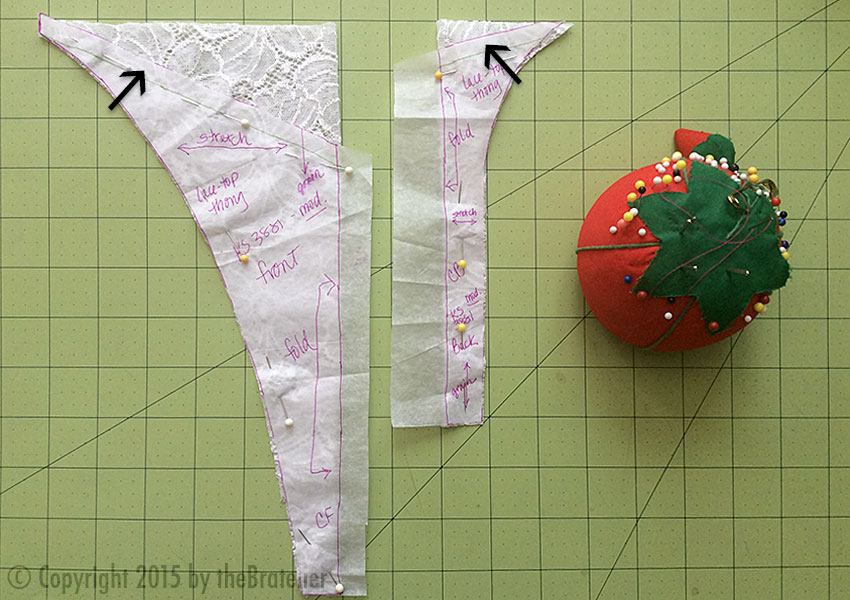
Sewing the Little White Thong (LWT): If you remember my first thong, I modified the top to accommodate a wide band of stretch lace; I started with the same modified pattern, but made a further change: instead of the V-shape formed by the lace in the center front and back, this time I simply went straight across the top with the lace band.

Here are my pattern modifications for the LWT, such as they are. I’m starting with the pattern that I had previously modified; click here to see those original changes, if you want your band to be angled rather than straight.
The only other change I made for this LWT was that I decided to simplify the crotch lining by cutting it with the same piece as the front. I stay-stitched the lining to the lace fabric, and treated them as 1 layer from that point on. (I wouldn’t do this for regular panties, but I thought it would work well for a thong.)

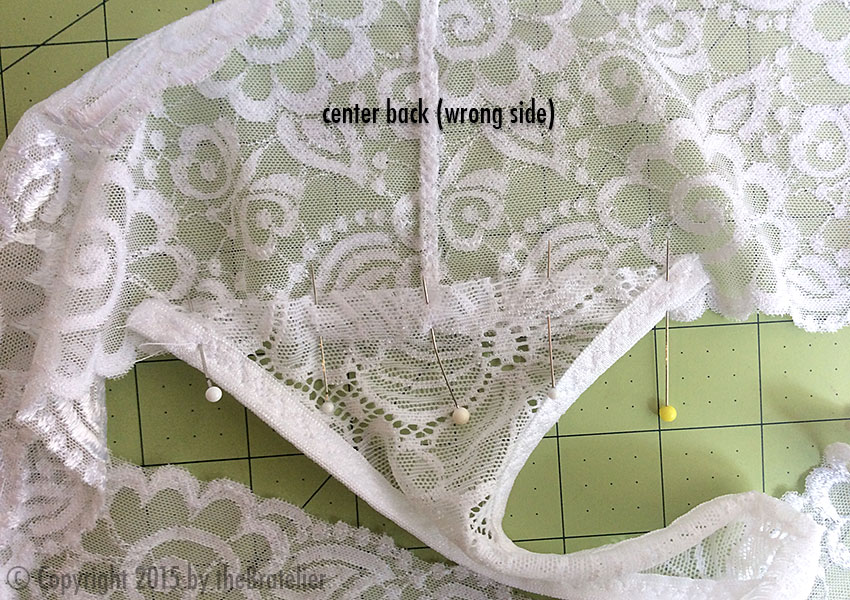
After sewing the crotch seam, joining the front to the back, the leg edges are finished with foldover elastic, then all that’s left to do is sewing on the lace band at the top!
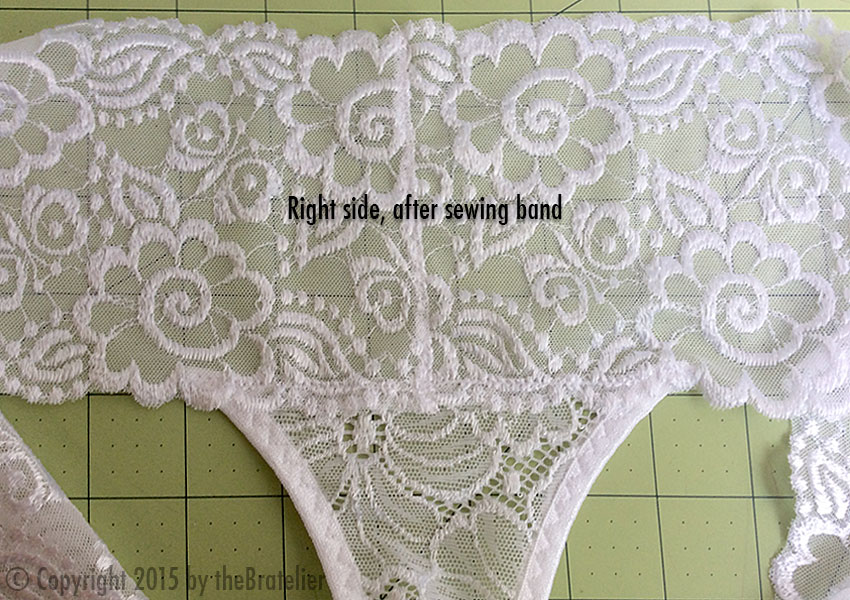
After repeating this same procedure to sew the band on to the front of the thong, I’m done! Now both my LWP and LWT are ready to dye! That’s up next— don’t miss it!
Helpful links:
There’s a complete tutorial on sewing an enclosed crotch lining (no exposed seams) in this post.
Click here for a post with instructions for sewing foldover elastic.

You never cease to amaze me. You made the most beautiful panties. I made my first pair today, and although I liked them, they don’t even come close to the expertise and beauty of yours. You are an inspiration for sure! Thanks for the pictures and suggestions. I’ll be using them!
LikeLike
[…] that I’ve made my Little White Panty and Little White Thong, I can’t wait to try out some of my dyeing ideas! If you’ve seen the results of dyeing […]
LikeLike