Now that I’ve got my cups sewn into my third bra project, it’s time for one of the main things I’m doing differently than the pattern (Kwik-Sew 3594): adding underwires. That is, at this phase, I’ll be adding channeling to house the underwires, which will get inserted a little later. Here’s what I’ve got so far:

The pattern doesn’t call for underwires; instead, the instructions say to cover the cup-band seams with strips of nylon tricot binding.
Tip: Even if you don’t want underwires in your bra, many bra-making experts suggest sewing in the channeling anyway; this adds a bit of soft structure to the cups, and also helps keep the cup seams from stretching out. The tricot binding specified in this particular pattern may give some support, but its main function is to cover the raw seam edges.
The thing about putting in channeling is that it makes it necessary to carefully plan how and when you’ll sew in your elastic trim, since that trim will ultimately cover the ends of the channeling; if you cover the ends too soon, you won’t be able to insert the wires! (Don’t ask me how I know this.)
Just for fun (okay, I want to see if it will make a difference), I’m starting by pre-curving my channeling. This is nothing more than using my steam iron to give a little cup-shaped curve to my channeling, thus:


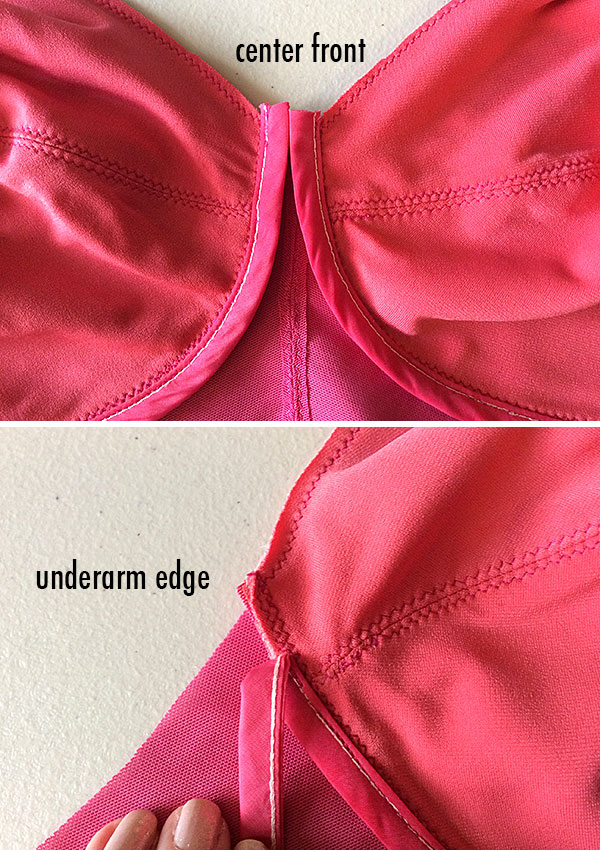
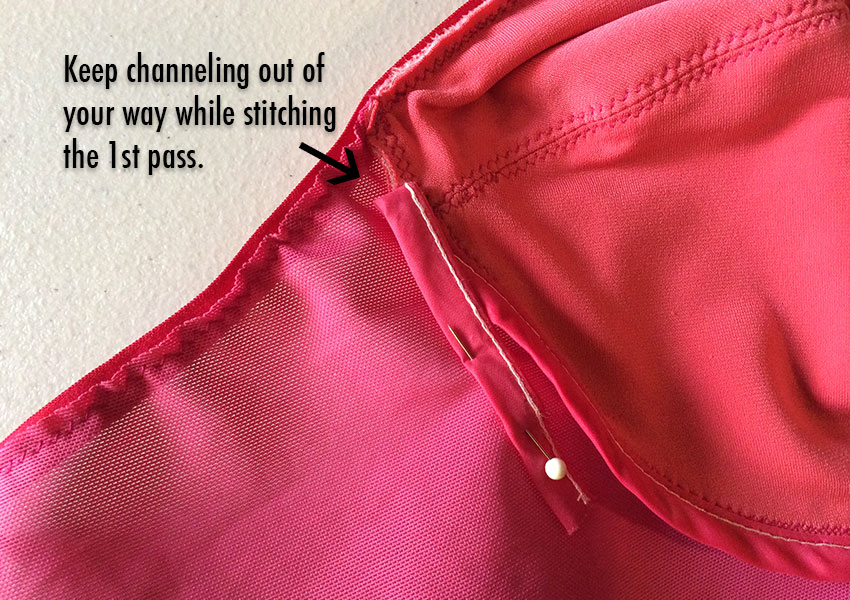
Tip: I’ve decided that I’ll insert my underwires (later) starting from the underarm edge of the cups, rather than center front. Making this decision before sewing on the channeling is really important; leaving the gap in the stitching at the arm and neck edges means I can keep the channeling open (and out of the way when I put on my elastic trim).
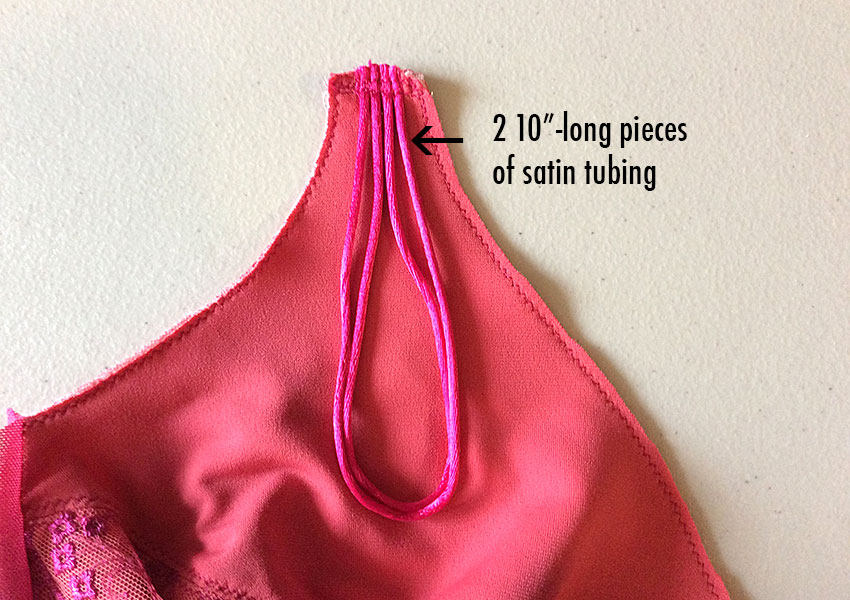
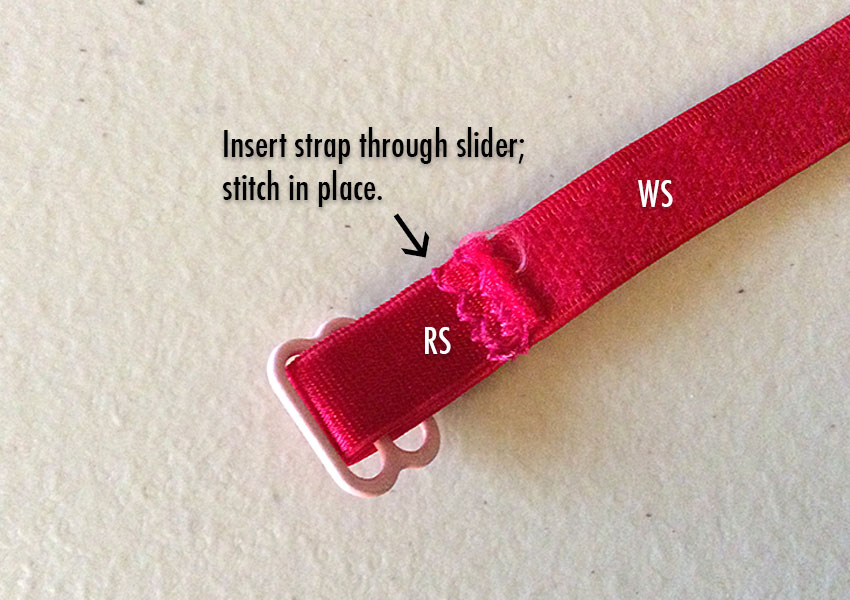
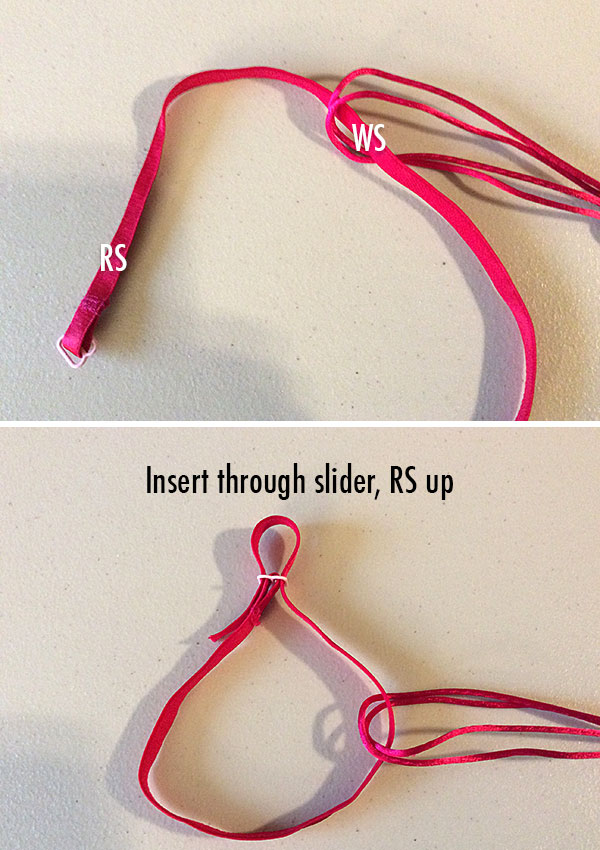
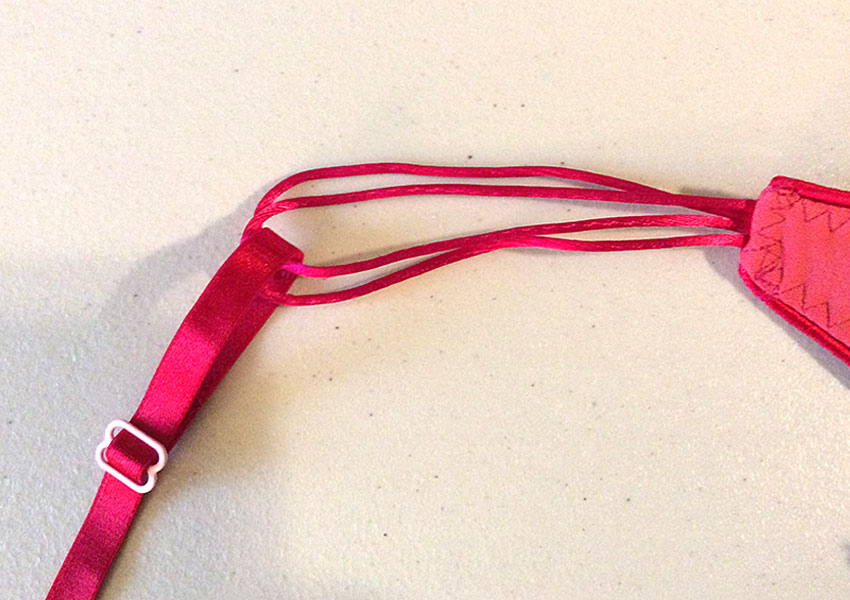
I think the toughest thing about not following a pattern to the letter is trying to figure out the order in which things need to get done. After some debate, I think I’ll do some preliminary work on a slightly fancy strap idea I’ve had:
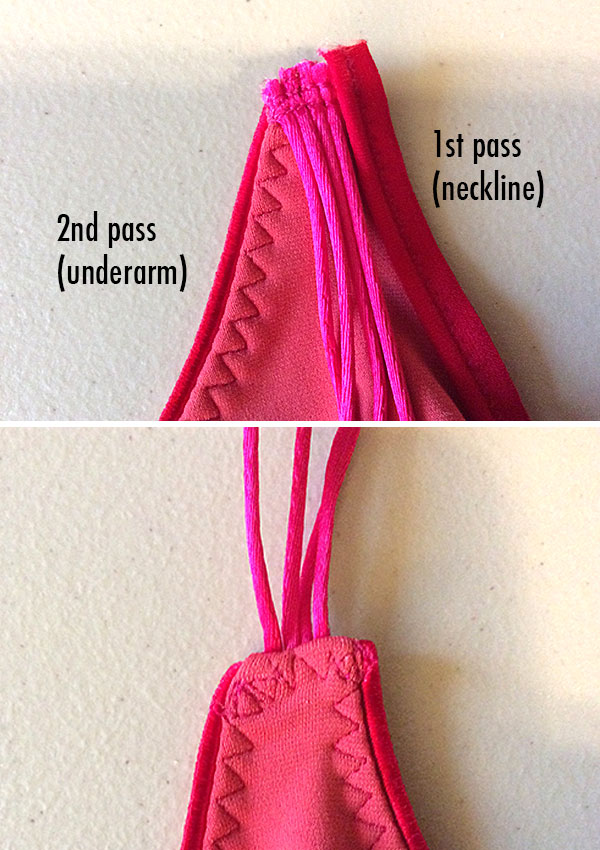
… now I’m going to sew on my elastic trim! Although this is a different style than the picot-edged trims I’ve used on my first two bras, it will go on exactly the same way: in 2 stitching passes. Here’s the bottom of the band after the first pass:
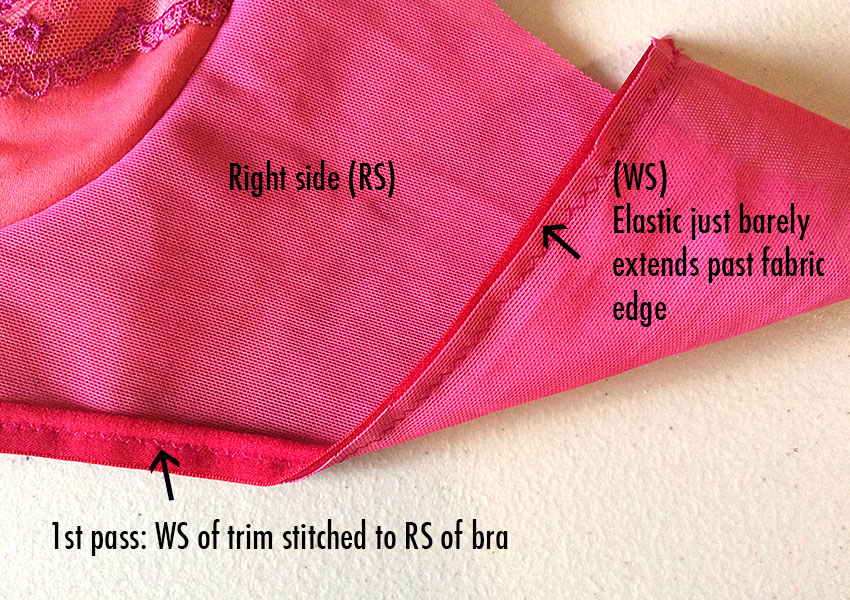
Tip: For the 1st stitching pass, use a small zig-zag stitch. Machine settings vary, but here’s what I use: stitch width = 2.0, stitch length = 2.0.
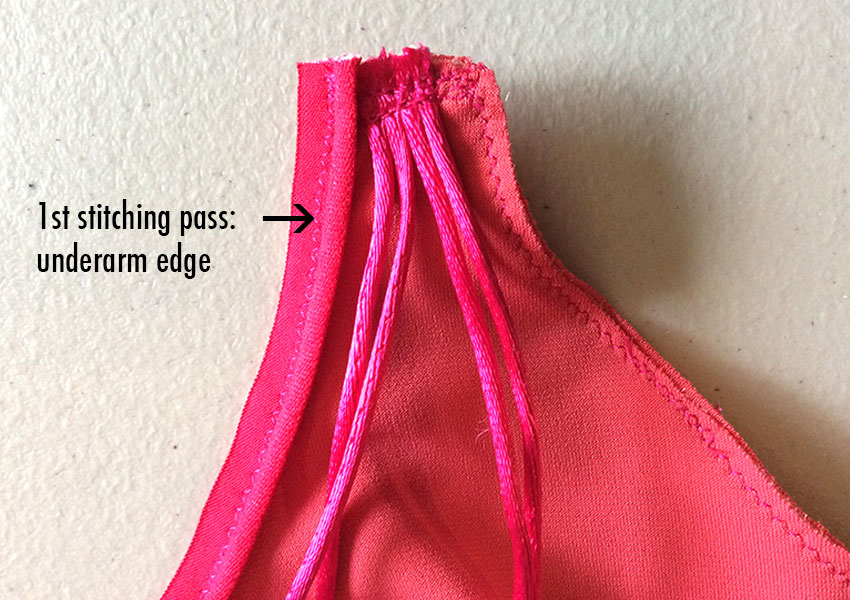

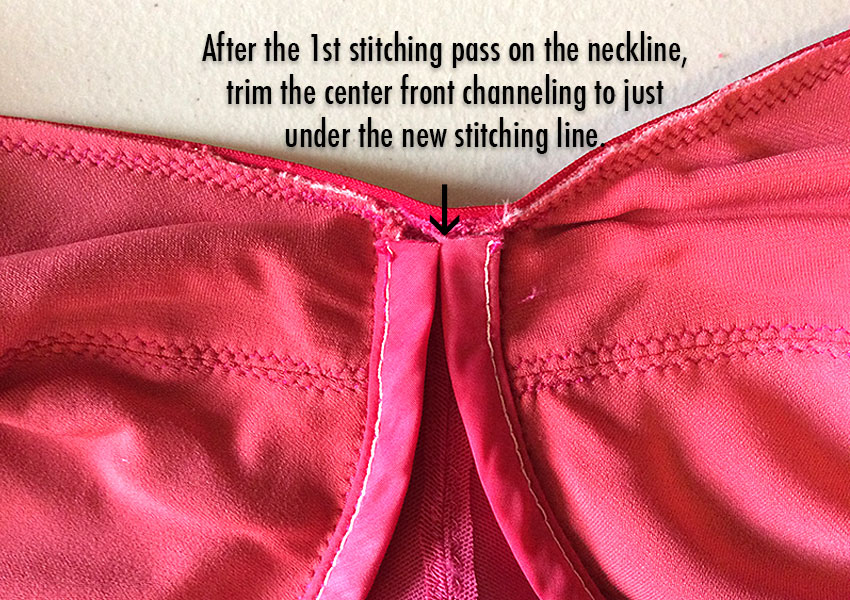
Do the same thing on the neckline edge, after stitching your 1st pass:
After sewing down the second edge of my channeling, I’m ready to do my 2nd stitching passes to finish my elastic trim!
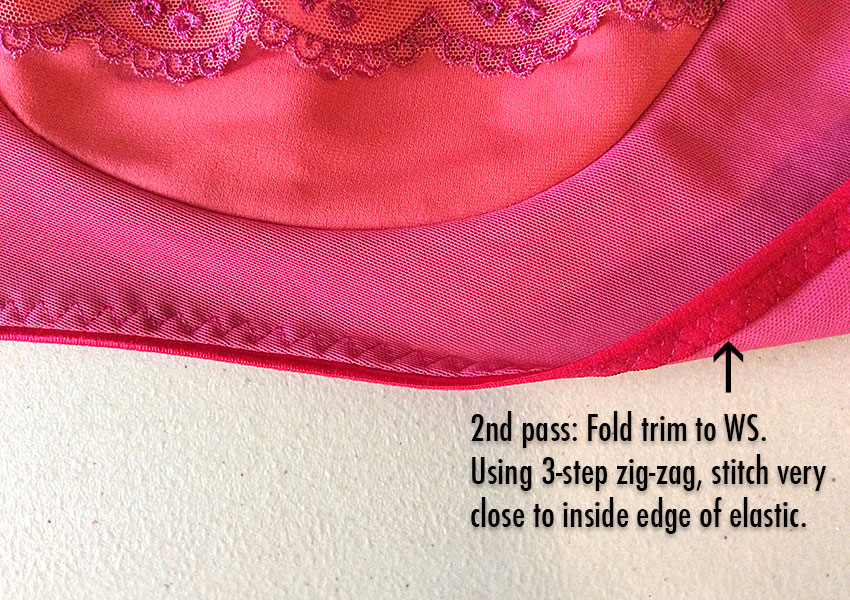
Tip: My settings for this 3-step zig-zag: stitch width = 1.5, stitch length = 5.0. Your machine settings may be different, so test settings on a scrap of your fabric.

I know this isn’t the usual order of things, but I’m going to put in my underwires now.
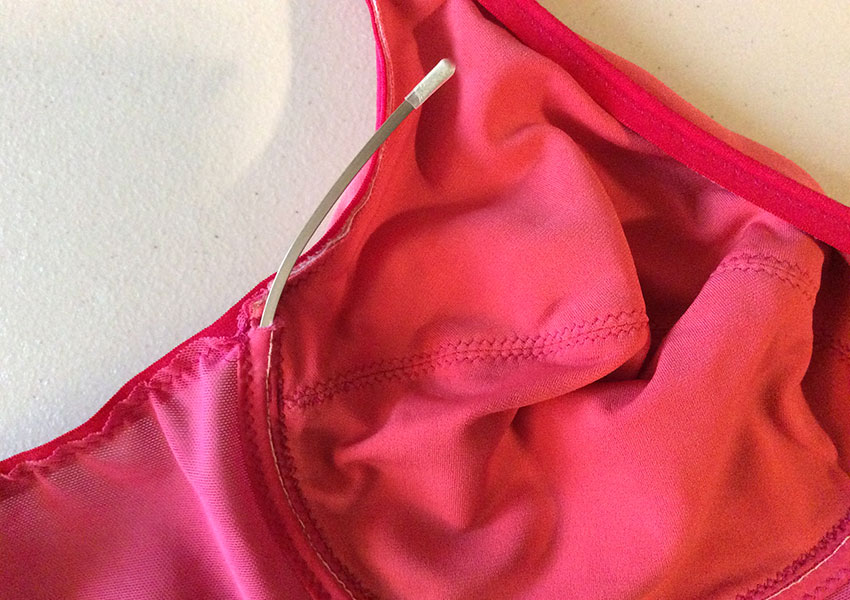
Now I can finish the underarm elastic trim, first making sure that I’ve pushed the wires down as far as possible away from that elastic edge— I don’t want to risk sewing over the wire!
When I come to the front (strap) edge of the underarm elastic, I’m going to stitch right over the satin tubing.
Aside: Since I was making up this strap thing as I went along, it wasn’t until I got to this point that I realized there was a better way to handle those satin tubes. If I’d thought of it way back before I even basted the cups and their linings together, it would have looked much better than this! I’ll try this idea again in the future, and hopefully have a better technique to show you. End of aside.
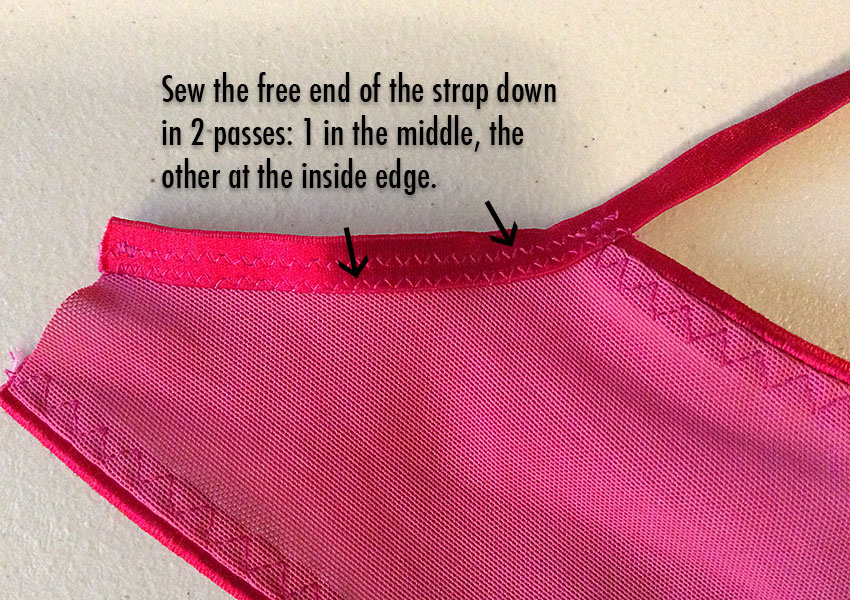
Now all I have to do is add the rest of the strap material, stitch it down at the back, and finish off with the back closure! Hurrah— the home stretch! (I don’t know why, but that phrase always makes me giggle in the context of bra-making.)
The adjustable straps are finished!
Before I stitch the other end of the straps down at the back, I want to make sure my closure will be the right width.
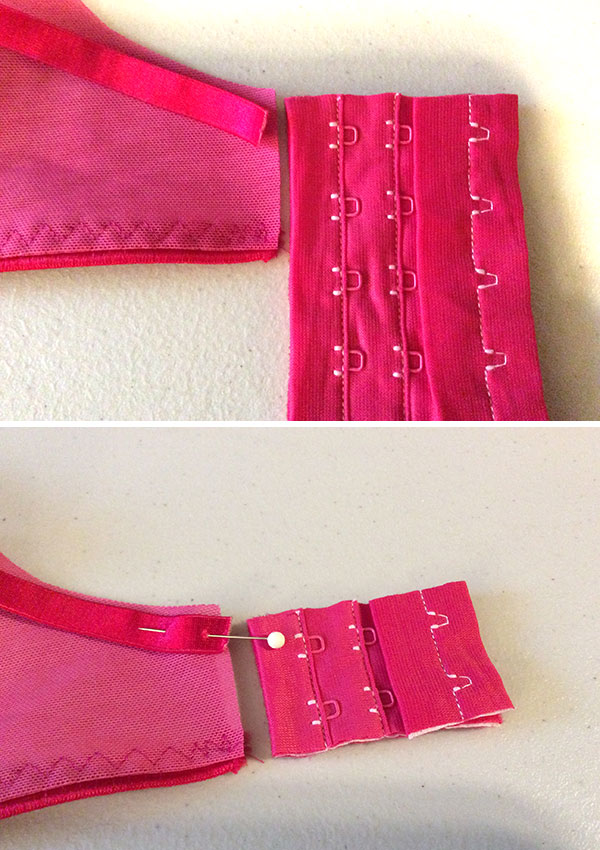
I like to hand-baste my closures in place; since each piece is sandwiched around the fabric part, this just makes it easier to manage all those layers.

I’m done! Oops, almost forgot the embellishments— I’ll hand-sew one at the base of each strap, and one in the center. NOW I’m done!
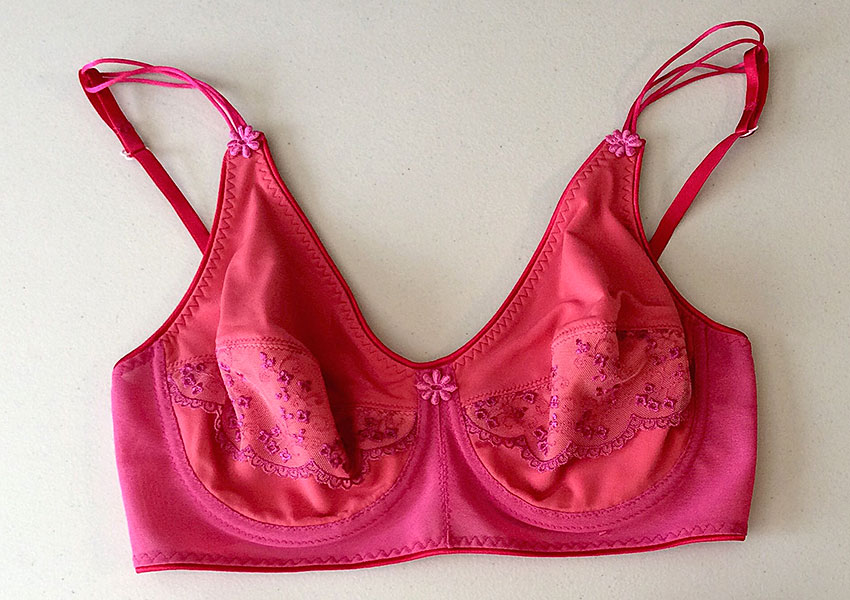
This style is quite different from my first two bras; the band is almost long-line-style (short-line?). I’m curious to find out how it fits and feels— stay tuned!
Belated tip: While working on this bra, I realized that, because I was working with a limited tonal range of colors, I could just pick one thread color and stick with that, rather than hassling with changing thread colors every 5 minutes. In this case, I used magenta thread, similar to the embroidery color on the lace.
I’m planning a matching bikini panty to go with this bra, using Kwik-Sew 3881 (yes, the same pattern I used for my thong). More on that coming up!
Update: I’ve just listed kits to make this bra in my new Etsy shop, theBratelier!

[…] going to take a little break, and I’ll show you how I finished this bra in my next post. Stay tuned, […]
LikeLike
What a beautiful bra! I love the way the colors compliment each other and all the little touches that make it special.
LikeLiked by 1 person
Thank you! That’s really encouraging, since I’m still quite new to bra-making.
LikeLike
[…] that I’m finished making my third bra, I wanted to do a quick follow-up about the bikini panty I made to go with it. I’ve used the […]
LikeLike
Lindy, you have no idea how much I’ve learned from carefully viewing the details of your bra making. You do really beautiful work, and your so creative! Thank you so much for taking the time to post this!
LikeLiked by 1 person
Elaine, thank you so much for your encouraging words— I really do appreciate that, and that you’re not only reading my posts, but getting something good from them!
LikeLike
This bra is so gorgeous! I can’t believe it’s only your third one! 🙂 Such a pretty colour and I love the little touches in it. ❤
LikeLiked by 1 person
[…] loud, wear ’em proud! I have, in fact, worn almost all of my bras and panties at least once; my third bra is the only piece that’s really just too small (a pity, because I really like how it turned […]
LikeLike
[…] color palette, it may be possible to pick just 1 thread color that will blend with everything. (For my third bra, which was a range of coral, fuchsia, and rosy red, I sewed everything with fuchsia thread.) It […]
LikeLike